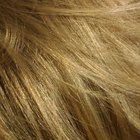
Wig clips are small combs that are used to secure wigs, toupees and hairpieces to existing hair. If you are looking for the convenience of being able to freely take on and take off your wig or toupee, wig clips are a viable solution. Wig clips can be used alone to secure a wig, or they can be used in conjunction with adhesive or tape. Wig clips are typically sewn in around the perimeter of the wig or toupee lining.
Determine the best points along the perimeter of your hairpiece lining to attach the clips. You may want to just use clips at the back with adhesive at the front to maintain the look of a natural hairline in the front. Without adhesive, you may want to use clips at the back and at sides of your crown. You can also put a wig clip in the middle of the piece. How many clips you use will depend on the type and size of the hairpiece and how much pre-existing hair you have.
Thread your needle so you have a long double thread.
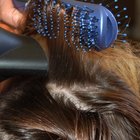
Sew the clips along the edge of the lining. If you have a lace wig, fold and pin the lining back to double the material. Place clips so the comb teeth are facing up and so the rubber strip is against the lining. The long edge of the clip should line up with the edge of the lining. Stitch through the lining, up through each hole in the clip. There will be several holes for sewing around the perimeter of the clip. Go through each hole three times and secure each pass through a hole with a lock stitch. Make lock stitches by passing the needle through the two threads and pulling it tight.
Cut the flaps from between each clip if you have a lace wig. Cut them to create a straight, unfolded edge that lines up with the front edge of the comb.
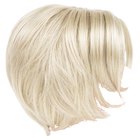
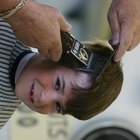
Attach the hairpiece to your head by pressing on the centers of the combs to unsnap and open them. Pull the hairpiece tight and slide the teeth of each comb into the hair or under the hair cap.
Press on the centers again to snap and close the clips.
Related Articles
How to Adjust Bead Extensions

How to Make Headband Wigs

How to Use Velcro Rollers So They Don't ...
How to Style a Kanekalon Wig
How to Keep Wigs From Slipping
How to Apply Lace Wigs With No Tape or ...
How to Do a Quick Weave Ponytail

How to Remove Hairspray From Wigs

How to Apply Full Lace Wigs

How to Unclump Eyelashes
Directions for Cutting Hair With a ...

How to Attach a Wedding Veil to a Hair ...

What Is a Capless Wig?
How to Put in a 27-Piece Hair Weave

How to Pin Curl Short Hair

How to Braid a Ribbon Into the Hair

How to Highlight Wigs

The Effects of Wig Adhesives

How to Straighten Your Weave
How to Attach Rivets in Fabric
References
Writer Bio
Mason Howard is an artist and writer in Minneapolis. Howard's work has been published in the "Creative Quarterly Journal of Art & Design" and "New American Paintings." He has also written for art exhibition catalogs and publications. Howard's recent writing includes covering popular culture, home improvement, cooking, health and fitness. He received his Master of Fine Arts from the University of Minnesota.