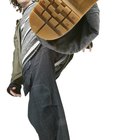
The Birkenstock family was the first to produce shoes that conformed to the human foot, revolutionizing footwear. Since the invention of the arch support in 1902, Birkenstock shoes developed a worldwide reputation for comfort. Like all shoes, these sandals gradually wear out, and may need some repair to last through seasons of use.
Inspect the soles of your Birkenstock shoes. If the material is worn down to ¼ inch on the heels or toes, you need to repair the sandals to prevent them from wearing out.
Install heel or toe taps to the Birkenstocks, depending on the area of most wear. Your walk determines whether you will wear out the heels or toes of your shoes faster. You may need to use both heel and toes taps for your Birkenstocks.
Apply the heel and toe taps following product instructions. Many of these products are self-adhesive, meaning that you need only peel the sticker and apply the taps. Some may require you to use your own adhesive. Use a strong fabric or craft glue, or a shoe-specific adhesive like Shoe Goo.
Clean your Birkenstocks with a mild leather cleaner. Rub the cleaner onto the strap surface with a clean cloth. Wipe cleaner away with a cloth dampened in warm water. This will remove stains, dirt and other contaminants.
Condition the exposed edges of the cork soles with cork oil. Birkenstock produces a product called Cork Life, but generic substitutes are available. Apply a thin coat of the oil to all exposed cork edges on the sides of your Birkenstocks. This oil can help to cover small scratches and nicks, and protect the cork from weathering.
Related Articles

How to Fix the Sole of Boots That Are ...
How to Care for Your Blundstones

How to Repair Doc Martens

How to Repair Keen Shoes
How to Take Care of Rubber Boots
How to Clean Scuffed Up Rain Boots
How to Fix a Crack in My Hunter Wellies
How to Repair a Split Rubber Sole

How to Tell the Size of Havaianas
How to Use Inserts With Dansko ...
How to Clean Oil Off Suede Boots

How to Repair Squeaky Crocs
Care for Mephisto Sandals
What Are Ugg Boots Made Out Of?

How to Treat Leather Boots With ...
How to Treat Doc Martens With Mink Oil

Can You Use Mink Oil on Snakeskin Boots?
How to Clean Suede Shoes With Oil
How to Keep Keen Sandals From Stinking

How to Clean Polo Boots
References
Writer Bio
Samantha Volz has been involved in journalistic and informative writing for over eight years. She holds a bachelor's degree in English literature from Lycoming College, Williamsport, Pennsylvania, with a minor in European history. In college she was editor-in-chief of the student newspaper and completed a professional internship with the "Williamsport Sun-Gazette," serving as a full-time reporter. She resides in Horsham, Pennsylvania.