You do not have to be a professional writer to make an autobiography. Tell your story with photographs. Use a computer to design, arrange and print your picture book. Or go traditional and make it by hand. Enlist the help of your family. Afterward, go over your work and relive cherished memories together. You can make a picture biography for other members of your family. These make inexpensive gifts that you and your loved ones will always cherish.
Preparation
Gather all of your pictures. Look in your photo albums, picture frames, CDs and computer. Ask your family members if they have more pictures in their keeping. If your relatives live far away, ask them to scan the photos and send them to you via e-mail.
Sit down with a family member who is familiar with the history behind those pictures; review them together. Ask your relative for a background on the photos if you do not remember on your own.
Collect pictures that were taken during special times in your life. Do not hesitate to include your favorite photos as well, even if they do not mark an important event of any kind. Set them aside.
Arrange your chosen pictures in chronological order. If you have a mix of pictures saved on CDs and printed photos, arrange them separately or write down how you want to arrange them.
Using a Computer
Copy those pictures from CDs to your computer. Scan the printed pictures to your computer. Use a flatbed scanner. Your printer may already have one. Check your printer/scanner manual for help.
Open a word processing or desktop publishing application. Examples are Microsoft Word, Open Office and Corel Draw. Use whichever you are familiar with. Any program that can copy pictures and insert text in multiple pages would do.
Start a new document in the application. Insert the first picture on the first page. Below the picture, type a few words or a sentence to begin telling your autobiography. For example, tell how and when you were born. Add a description of the picture.
Insert another picture on the next page. Continue your story from the previous page. Repeat for all your pictures. Add one or two photos to each page and type few lines of text below each one. Don't forget to mention dates and times when you think they are important.
Save your work to your computer. Print on photo-quality paper using your printer. Put the sheets together in a folder or binder. Write your autobiography title on the cover or print a separate cover sheet.
Handmade
Collect your pictures after you have arranged them. If needed, print copies of pictures saved on your computer or CDs.
Glue each printed picture on a blank sheet of paper, using paper glue.
Write below the picture about the memory or event that the picture represents. Use a ruler for even writing, if needed.
Repeat for each picture in your autobiography collection. Arrange them in chronological order.
Insert each sheet of paper in a sheet protector. Put them together in a binder or folder. Write a title on the cover if desired.
Related Articles
How to Make a Photo Slideshow for an ...
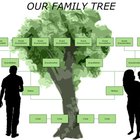
How to Make a Family Tree Using a Free ...
How to Write a Grandparent's Biography

How to Make a Class Reunion Memory Book
How to Stop AARP Mail
How to Create a Class Reunion Database

How to Use My Webcam to Chat With Other ...

How to Make a Romantic Collage for Your ...

Family Tree Book Cover Ideas
How to Find Mothers Maiden Name
How to Make a Photo Collage Out of ...

How to Map German Surnames
How to Design a Family Tree for Free
How to Change the Color of a Wig
How to Make a Rhinestone Template

How to Make a Church Seal

How to Trace the History of a Name
How to Make a Pictorial Address ...
How to Find Obituaries From Over 10 ...

How to Find a High School Picture Online
References
Writer Bio
Jay Leon began work as a writer and blogger in 2007. Her clients have included content provider Averheld and Loudoun Rewards Club. She writes about computing, web design, the Internet and travel.
Photo Credits
Photo Album image by rlat from Fotolia.com