Alex Wong/Getty Images News/Getty Images
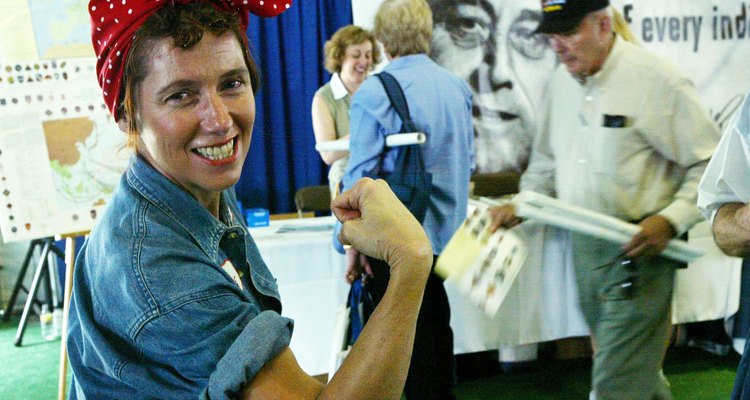
Get your girl power on – whether for Halloween or in everyday life – and tie your hair up in a bandana like Rosie the Riveter. This classic look recalls the iconic "We Can Do It" poster that was created by the U.S. government to entice women into the munitions workforce in the early 1940s. These days, you're more likely to see rockabilly girls sporting Rosie's classic red bandana at tattoo conventions than on factory lines, but the look maintains its tough-chick chic.
Twist your hair into a bun at the back of your head. Secure it all the way around with bobby pins. Depending on the length of your hair, you might find it easier to create two to three small buns to keep the hair flatter against your head.
Fold the bandana in half diagonally to create a triangle and take the right outer edge of the triangle in your right hand and the left outer edge in your left hand.
Lean forward at the waist and lay the folded edge of the bandana along your hairline at the back of your head. The center point of the triangle should cover the crown of your head and point toward your forehead.
Still bent, pull both of the ends up over the center point of the triangle at the top of your head. Tie the ends into a single knot – like the beginning of a bow – so that the center point is trapped beneath the knot.
Straighten yourself up and give the overlapped ends a tug to tighten the base of the knot. The point of the center triangle should stick out in front of the knot and you should have two large flaps poking out just behind the knot, one on each side of your head.
Fold the large flaps inward, toward the top center of your head. Tuck them in on themselves, hiding the excess fabric beneath the sides of the bandana.
Fold the center point backward, over the top of the base of the knot.
Take out the two ends and tie them into a knot around the tucked point to hide it.
Give any bangs you have a quick brush forward, being careful not to catch the knot with the brush.
Related Articles

How to Do Small Single Braids Yourself
How to Braid in Fake Hair
How to Wear a Motorcycle Bandana

How to Put on a Bandana on Your Head

How to Wear a Scarf to Cover the Ears

How to Curl Bangs Upward

How to Sew in Dreads

How to Pin Curl Short Hair

How to Do a High-Fashion Teased Ponytail
How to Wear an Orthodox Head Scarf
How to Do an English Braid
How to Feather Bangs

How to Wrap Hair Without Breakage

How to Put Dreads in a Bun
How to tie a doo rag
How to Make Gibson-Girl Hairdos

How to Tie a Cowboy Bandana
How to Tie Your Hair Into a Tight Bun ...

How to Get Curls for Little Girls ...

The Best Ways to Do a Gymnast's Hair
References
Tips
- If desired, secure the bottom of the bandana to the hair at the nape of your neck with a bobby pin on each side of the head.
Writer Bio
S.R. Becker is a certified yoga teacher based in Queens, N.Y. She has a Master of Fine Arts in creative writing and has worked as a writer and editor for more than 15 years. Becker often writes for "Yoga in Astoria," a newsletter about studios throughout New York City.
Photo Credits
Alex Wong/Getty Images News/Getty Images