
Your 4-year-old has grown a lot and it's time to celebrate another year of accomplishments. She is excited and you are eager to plan a festive party for her. Preschooler birthday parties are usually shorter, lasting only two to three hours. This is enough time to show your daughter and her guests a fun time without overwhelming them with activities and treats. Here are some ideas to help you plan your little girl's special day.
Themes
Themed birthday parties aren't necessary, but 4-year-old girls enjoy them. Choose a theme based on your little girl's interests and hobbies. She may favor a certain cartoon or movie character that you can incorporate into her party. She may enjoy tea parties, dressing up, princesses, fairies, ballet or sports. You can be more elaborate and hire someone to dress up in a character's costume, but birthday parties for preschoolers tend to be simple. Choose all your party materials to match the theme. Balloons, streamers, party hats and tablecloths can be picked featuring appropriate images and in coordinating colors. Party favors and goody bags can be selected and put together with the theme in mind.
Invitations
Keep your guest list small so you aren't too busy keeping the energy level down to enjoy yourself. If your daughter attends preschool, ask her teacher for a list of children's names. Otherwise, invite her friends from playgroup or the park. Buy invitations complete with envelopes from party supply, discount or department stores or make them using your computer and printer. Choose invitations or templates that fit the party's theme. Include the address, your daughter's name, your phone number and notes concerning appropriate clothing, costumes or gifts. Draw or print a map with directions to tuck into the card. Hand the invitations out in person, give them to your child's preschool teacher or mail them.
Activities
Four-year-olds like energetic games and activities that spark their interests. Think about the theme of your daughter's party when brainstorming the possibilities. The girls will revel in the opportunity to paint their faces, have a tea party, do their nails, play soccer or dress up in ballerina or princess costumes. Have the girls participate in cooperative, structured activities. Too much excitement or lack of supervision can lead to problems with the children playing well together and staying in a festive mood. You can also opt for timeless fun with tried-and-true favorites such as "Duck, Duck, Goose!" -- remember that one? Schedule what time each event will start and end. The activities you plan depend on the location of the party. If you are having it at home, decide on whether it will be indoors or outdoors. If not, you need to book a location ahead of time.
Menu
Plan the party menu around the theme or choose simple foods that are popular with preschoolers. Children this age can be picky about what they eat so there is really no need to get fancy. Be aware of any allergies guests may have before you finalize your menu. If you like to cook and bake and you have the time, the meal, snacks and treats can be made and decorated in the party theme. If you going the simplest route, pizza, hot dogs and sandwiches are all popular options. Finger foods are fun for children and the less mess you have to clean up after the better! Have plenty of refreshments and napkins ready.
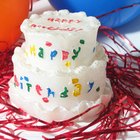
Cake
The cake is often the highlight of any party. Bake, ice and decorate the cake yourself or buy one already completed. Or, buy a plain cake then ice and decorate it yourself. The cake should be in a flavor your daughter likes. The shape and decorations should be in the theme of the party. Character cake pans can be purchased. If you are buying a themed cake from the bakery, order it in advance so it will be ready in time for the party. Plan when you want to bring out the cake. Gifts are often opened after the cake has been eaten or before guests leave. Some parents ask their child to open each gift as their guests arrive to keep the party timely and organized.
Related Articles

Five-Year-Old Birthday Party Ideas for ...

Unique 13th Birthday Party Ideas

Bachelorette Party Ideas for the Mormon ...

High School Graduation Pool Party Ideas

How to Plan a Brunch Menu

Easy Finger Food for a Teenager's ...

Wedding Reception Program Ideas

90th Birthday Party Ideas for Dad at ...
16th Birthday Sleepover Party Ideas

How to Cater Your Own Party
Food to Serve at My 4-Year-Old's ...

Places to Have a Two-Year-Old's ...
Elegant 50th Birthday Party Ideas

Easy Birthday Cake Ideas for a ...

Organizing a Speed Dating Night

How to Plan a Birthday Party for a ...

Invitations to Make & Print at Home for ...

Christian Ladies Brunch Ideas

Boardwalk Themed Party Ideas

Christian Bridal Shower Ideas
References
Resources
Writer Bio
Kelly O'Brien Ritchie has been a writer since 1998. She has contributed to the Lawrence House Centre for the Arts, Sarnia Historical Society and community newspapers. Ritchie managed her own business for eight years and studied corporate communications at Centennial College.
Photo Credits
Jupiterimages/Photos.com/Getty Images