
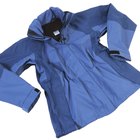
A small rip or tear in a leather jacket does not mean you have to get rid of it, but it does mean that you must take care of it quickly. Leather jacket repair kits that allow you to do the job yourself are available on the Internet and in department stores. Even if the damage is in a fairly conspicuous area of the jacket, a few simple steps will repair the jacket, giving it many more years of use.
Clean the area around the tear using a mixture of mild detergent and water. Even the damaged edges by cutting away frays with a razor knife.
Turn the jacket inside out. Locate the lining seam nearest to the tear. Gently open the seam, snipping the threads with scissors, to allow you to get between the lining and jacket shell behind the location of the tear.
Turn the jacket right side out and lay it on a flat surface. Fit the edges of the tear together as cleanly as possible. Place a piece of painter’s tape on the tear to hold the edges in place. Painter’s tape is made to hold to a surface but it can be removed easily, preventing additional damage to the surface of the leather.
Cut a small piece of fabric, at least 1/2-inch larger in diameter than the tear, to act as a subpatch. Any soft fabric will work. Turn the jacket inside out. Using leather glue, stick the jpiece of fabric to the tear on the inside of the leather jacket shell, through the opening in the lining seam. Use a pair of tweezers for more accurate placement control. Make sure the patch lies flat with no raised edges. Press down on the patch for several seconds allowing the bonding to take place. Let the glue dry.
Mix the repair compound and correct color to match the leather. Many colors are available for use in repair kits. Keep in mind that the heat application will cause the color to cure to a slightly darker shade.
Apply the repair compound mixture evenly over the tear, using the spatula provided in the kit. Place the grain paper provided on top of the repair compound. Place the hot tip of the heat transfer tool, typically provided in the repair kit, on the grain paper. Keep the hot tip in one spot, but move it in a slight circular motion for 15 seconds. Heat is used to cure the repair compound and is the key to a strong repair. Be sure to follow the repair kit manufacturer’s instructions carefully regarding the right amount of heat application during this step. Insufficient heat will make a weak repair. Excessive heat can ruin the grain of the material near the repair spot.
Apply the finish compound over the repair to complete the project.
Hand stitch the seam inside the jacket closed.
Related Articles

How to Fix a Ripped Winter Coat

How to Repair a Leather Belt

How to Fix a Burn Hole in a Polyester ...
How to Patch Leather Boots

How to Fix Leather Boots
How to Repair a Cut on a Timberland Boot

How to Repair a Torn Lambskin Leather ...
How to Easily Mend a Small Burn in a ...

How to Fix Cuts in Polyester Clothes

How to Repair a Fiberglass Swimming Pool
How to Restore Tintype Photos
How to Fix a Cracked Leather Watch Strap
How to Repair a Wedding Band
How to Fix Crepe Soles

How to Patch a Waterproof Rain Jacket
How to Repair Sheepskin Slippers

How to Glue a Leather Shoe Strap
How to Repair Leather Interiors of Shoes
How to Repair Gouged Leather Shoes
The Best Way to Stretch Patent Leather ...
References
Writer Bio
Karen Curinga has been writing published articles since 2003 and is the author of multiple books. Her articles have appeared in "UTHeath," "Catalyst" and more. Curinga is a freelance writer and certified coach/consultant who has worked with hundreds of clients. She received a Bachelor of Science in psychology.
Photo Credits
Jupiterimages/Brand X Pictures/Getty Images