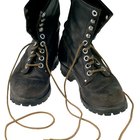
Whether working in wet areas, fishing, keeping dry in the rain or just being fashionable, rubber boots in one form or another are invaluable. When one of your boots rips, however, the waterproof quality is no longer present, making the boots useless in many applications. Instead of throwing them out and purchasing a new pair, an inexpensive home repair can bring new life to your damaged boots.
How to Seal Boots With Patches
Lightly scrub the area around the tear on the inside and outside of the boot with a scouring pad to clean the surface and provide a grip for optimal adhesion. Wipe the area to remove any debris.
Cut the rubber patch so that it is large enough to completely cover the ripped area. In addition, make sure that the patch is big enough so that there will be 1/2-inch of border around the tear.
Apply the self-adhesive patch over the tear with the adhesive side facing the boot's surface. The patch may be applied on the inside or outside of the boot. Secure the patch by rubbing it in a circular motion, beginning at the center and working toward each edge; this will create a seal without trapped pockets of air. You can also use an iron set to medium heat. Simply rub the patch with the iron in a circular motion in order to increase adhesion. The boot may be used immediately.
How to Seal Boots With Liquid Sealant
Cut a piece of duct tape that is large enough to completely cover the tear. The piece should also be large enough to ensure that there is at least 1-inch of duct tape bordering the tear.
Align the edges of the rip and apply duct tape to the tear on the inside of the boot. The use of duct tape stabilizes the torn area and prevents the rip from enlarging.
Apply the Aquaseal to the tear on the outside of the boot, overlapping each side of the rip by 1/8-inch. Place the boot in a well ventilated and temperature controlled area to dry for at least 12 hours.
Remove the duct tape and apply Aquaseal to the tear on the inside of the boot, again overlapping each side of the rip by 1/8-inch. Return the boot to the drying area and allow it to dry for at least 12 hours.
Related Articles

How to Care for Chippewa Boots

How to Repair Rubber Boots

How to Take Care of the Leather for Red ...

How to Use Shoe Goo

How to Fix a Crack in My Hunter Wellies

How to Clean Scuffed Up Rain Boots

How to Care for Asolo Leather Hiking ...

Fixing a Boot's Heel

How to Paint on Leather Boots

How to Make Leather Boots

How to Care for Vinyl Women's Fashion ...

How to Treat Doc Martens With Mink Oil

How to Harden Leather Boots

Getting Dirt Stains Out of Gray Leather ...

How to Care for Frye Boots

How to Fix a Leaky Pair of Rubber Boots

How to Clean the Insides of Rubber Boots

How to Care for Chippewa Boots

How to Moisturize Old Leather Boots

How to Repair a Shoe Sole With Silicone
References
Writer Bio
Marie Clay began writing professionally for an advertising firm in 2004. She holds a Bachelor of Science in mass communication from Illinois State University, where she was named Outstanding Honors Student for her graduating class and holds a third-degree black belt in Taekwondo with the World Taekwondo Federation. Her specialties include interactive media, art, computer software and programming, and parenting.
Photo Credits
Jupiterimages/liquidlibrary/Getty Images