
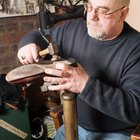
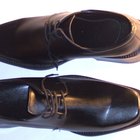
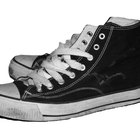
San Antonio Shoes (SAS) launched in 1976, and has since become known for both comfort and long-lasting quality. Thus, wearing the soles out on your favorite pair of SAS shoes is a disheartening experience. You might think your only two options are an expensive trip to your local shoe repair shop or a reticent toss of the shoes into the trash can, but in fact there are repairs you can complete yourself, at home, with a few supplies and a little patience.
Cut the soles off of your SAS shoes with an exacto knife, removing about 1/4 inch of the sole and perhaps a bit more angling up at the heel. You want to get enough of the sole off, without cutting any portion of the shoe. There should be a small, thin layer of the old sole remaining.
Use a sander or sandpaper to sand down the remaining layer of your SAS shoe soles to create a smooth surface. Don't sand the soles too much—you still need a thin layer of cushion left. Follow the angle of the shoes as you sand. You want the soles to retain the lines and form of the shoes.
Trace an outline onto your new soles with a piece of chalk, using one of the old SAS shoe soles you removed as a guide. If the new soles are not identical SAS shoe soles and sizes, cut the new soles with the exacto blade, following the line you traced for an exact fit.
Bond the new soles to the remaining sanded sole cushions on the shoes, using a heavy-duty or industrial-strength shoe adhesive. Make sure you wipe away any adhesive residue that pushes out from the side of your shoes. Give the adhesive proper drying and bonding time.
Sand away any additional, undesired portions of the new soles that may stick out too far from the form and shape of your shoes.
Related Articles
How to Glue Soles on Cheap Work Boots
How to Remove an Odor From Shoes With ...
How to Repair a Split Sole on Shoes

How to Roughen Up the Soles of Your ...
How to Remove Ink From Shoes

How to Properly Stick Shoe Pads in ...
How to Clean Wallabee Soles
How to Replace a Sole on a Timberland ...

How to Customize Your Own Running Shoes
How to Remove the Sole of a Sneaker
How to Replace a Nike Shoe Insole
How to Restore Leather Shoes
How to Clean Superfeet Foot Insoles

How to Remove Scuffs From Soccer Cleats

How to Rehydrate Cracked Dress Shoes
How to Change the Soles on a Shoe From ...

How to Make Mens Moccasin Boots
How to Repair a Shoe Sole With Silicone

How to Break in Man-Made-Leather Shoes

How to Fix Nicks in Shoe Toes
References
Writer Bio
Ally Tracy began writing in 1988. One of her poems, "A Kiss," was published in an edition of the "Norton Anthology," and her work includes numerous screenplays, short stories and children's stories. Tracy holds a Bachelor of Arts in psychology from the University of Southern California and a Master of Arts in psychology from Ryokan College.
Photo Credits
running man image by minik from Fotolia.com