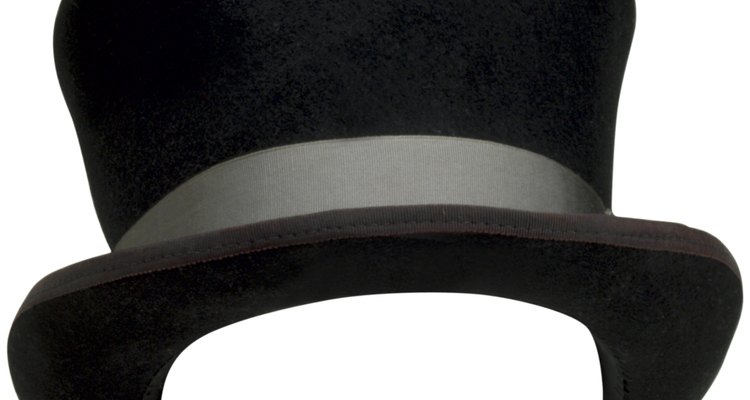
Top hats are usually worn for special occasions, but you can easily make your own top hats for formal wear or fun. You can make them for costumes instead of buying uncomfortable plastic ones from costume stores. The “cat in the hat” top hat is colorful, with alternating bands of color, and has become an icon. It follows the same steps as a regular top hat but with alternating color bands. Some top hats stand upright, while others are meant to tilt. The fabric you choose to make your top hat will depend on how upright you want your hat to be.
Choose a second color of craft felt. The usual choices are white, silver or a shiny black.
Cut two brim pieces, three bands and one top piece of the black craft felt. The brim is a circle 15 inches in diameter. The two bands should be 24 inches by 3.5 inches. The top piece should be a circle eight inches in diameter.
Cut one band piece of the other craft felt 24 inches by 3.5 inches.
Lay the two pieces of brim on top of each and sew them together 1/8 of inch from the outside.
Draw a 6 inch (or the diameter of your head) diameter circle with the fabric pen in the middle of the two brim pieces. Cut out that circle.
Turn the brim inside out and iron the liner, either side of the brim. Then sew the liner half an inch in.
Sew the three black bands together, edge to edge along the 24 inch side, 1/8 of an inch in. Then sew the other color band at the bottom. Unfold the bands and iron out.
Place the bands “wrong side up” on the top piece and sew them together starting an inch in. There should be an inch left over on both sides of the bands.
Turn the bands and top combo inside out and thread them through the hole in the brim. Line up the middle of the brim with the side of the bands opposite the open flap.
Sew bands/top combo to the brim starting from the middle, going right and stopping at the rear center. Then start at the middle again, going left, and stop at the rear center again.
Turn the hat inside out and squash it flat so you can line up the excess parts of the bands with the top. Sew the bands together along that line. Cut off any remaining excess band fabric.
Turn the hat right side out and wear it.
Related Articles

How to Hold a Band on a Cowboy Hat
How to Make a Swan Lake Headpiece

What Is an African Kufi Hat?

How to Make an Easy Child's Colonial ...

How to Make Renaissance Hats

How to Make a Paper Bouquet Holder

What Is a Snap Brim?

How to Make a Cone Hat With Felt

How to Fold a Black Beret

How to Wear New Era Hats

How to Make a Bridal Shower Hat

How to Wear a Scarf to Cover the Ears

How to Spray on Tie-Dye

How to Attach Stampede Ties to a Cowboy ...

How to Make Kilt Flashes

How to Make a Kid's Indian Costume From ...

How to Sew a Medieval Cowl

How to Restore the Shape of a Floppy Hat
How to Make a Dew Rag

How to Make a Nurse Costume for a ...
References
Tips
- If you want your hat to remain more upright, use a thicker fabric, artificial fur or vinyl upholstery. Heaver fabrics though require more heavy-duty sewing needles that can be bought in any craft store.
- Make the hat taller or shorter by making more or removing bands.
Writer Bio
Sarah Meem began writing in 2007. She specializes in coverage of Middle East topics, human trafficking and human rights issues. Meem has a Bachelor of Arts in international studies and Arabic from the University of North Carolina. She is pursuing a master's degree in social service administration from the University of Chicago.
Photo Credits
Ablestock.com/AbleStock.com/Getty Images