
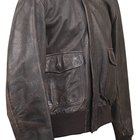
Even the most gorgeous leather coat, no matter how fashionable the style, can make you appear unattractive and dumpy if the fit isn't quite right. Whether standard sizing measurements just don't fit your body or a gift coat came a little longer than suits, hem the coat or sleeves to enhance your wardrobe. Avoid the cost of hem alterations on a plain or lined leather coat at a tailor's shop and shorten the sleeves or body hem yourself with minimal sewing, opting instead for a clean glued edge.
Step 1
Put the leather coat on inside out. Determine the ideal length of the sleeves and hem, then add 1 1/2 inches for a hem allowance.
Step 2
Mark the hem measurements with a piece of chalk, not sewing pins, as pins will make permanent holes in leather.
Step 3
Take off the coat. If the coat has a lining, unpick the hem thread at the sleeve and body hem with a seam ripper. Transfer the chalk markings from the leather to the lining fabric.
Step 4
Cut a strip of iron-on interfacing that is 1 1/2 inches wide and 1/2 inch longer than the hem circumference. Align the glue side of the interfacing against the leather, just above the hem marking.
Step 5
Set an iron to a low heat level with no steam. Iron over the interfacing to melt the glue, then trim the excess interfacing length. Add interfacing to each sleeve hem and the body hem.
Step 6
Cut along each hem marking to remove the excess leather and, if applicable, lining fabric.
Step 7
Brush leather glue or rubber cement over the top of the exposed side of the interfacing. Fold each hem 1 1/2 inches to the inside of the fabric, encasing the interfacing entirely, and press the fold down. If the fold does not stay flat, lay the hem over a block of wood and hit it firmly with a flat hammer.
Step 8
Fold the edge of the lining layer 1 1/2 inches to the inside and handstitch the fold to the leather layer, using a slipstitch and a leather needle.
Related Articles

How to Stop Your Leather Coat From ...
How to Alter the Length of a Leather ...

How to Clean the Leather on a High ...

How to Clean a Leather Varsity Jacket
How to Stop Satin from Fraying

How Can I Take the Shine Off My Fake ...

How to Waterproof a Leather Jacket

How to Care for and Clean Vintage ...

How to Clean High Heels

How to Prevent a Designer Purse From ...

How to Glue a Leather Shoe Strap

A Knee Length Skirt Goes With What Type ...

How to Hem a Sequin Dress

How to Fix Holes in Pantyhose

How to Distress the Bottoms of Jeans

How to Narrow Wide Pants

How to Wash Collar Stains on a Leather ...
How to Change the Color of Leather

How to Measure My Coat Size

How to Repair a Torn Lambskin Leather ...
References
- Sewing with Leather and Suede: Tips, Techniques and Inspiration; Sandy Scrivano
- Hand Mending for Beginners; 10 Easy Illustrated Steps to Save You Time and Money; Nan Ides
- How to Sew Leather, Suede and Fur; Phyllis W. Schwebke and Margaret B. Krohn
Resources
Writer Bio
A writer with a Bachelor of Science in English and secondary education, but also an interest in all things beautiful, Melissa J. Bell has handed out beauty and fashion advice since she could talk -- and for the last six years, write for online publications like Daily Glow and SheBudgets.
Photo Credits
PhotoObjects.net/PhotoObjects.net/Getty Images