
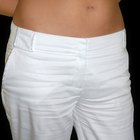
So you've lived through the trend of wide-legged pants and now it's back to reality with tapered pants and skinny jeans. But it doesn't mean you have to sacrifice an expensive wardrobe and restock it with new bottoms. If you can draw a straight chalk line and sew a seam, you can alter those wide-legged pants to make them custom tailored and narrower in no time, and without having to shell out major bucks to a tailor.
Step 1
Turn your pants inside out. Use a pair of small scissors to carefully remove the stitches from the hems. Pull off any thread remnants and discard. Iron the hem lightly so the fabric lies flat. This makes the measuring and sewing easier.
Step 2
Find a pair of pants with a width you like to use as a pattern. Turn them inside out and place them on top of the wide pants. Align the crotch and center the legs so there is equal fabric on both sides. Mark the outline of the “pattern” pants from the crotch to the hem on the inner and outer legs with chalk. Remove the pattern pants and pin both layers of the inner and outer seams every 4 inches along the length of each pant leg. Set the pins perpendicular to the chalk lines.
Step 3
Put on the wide pants and use safety pins at the inner and outer seam hemline to mark the desired width if you don’t have a pair of pants to use as a guide. Remove the pants and place them inside out on a flat, smooth surface. Use tailor's chalk to mark where the safety pins are on both the inner and outer seams. Remove the pins.
Step 4
Use a yardstick to mark a straight line from the crotch to 1/2 inch outside of the chalk mark on the inner ankle seam and from the bottom hip to 1/2 inch outside of the chalk mark on the outer ankle seam on both legs. Pin both layers of the inner and outer seams every 4 inches along the length of each pant leg. Set the pins perpendicular to the chalk lines.
Step 5
Sew seams with a straight stitch about 1/2 inch away from the chalk lines and remove the pins. Trim the seams to within 1/2 inch of the stitching. Fold the hem back and pin it in place. Restitch the hemline. Turn the pants inside out and iron the right side. For a custom finish, top-stitch the outer seams from hip to ankle with a matching or even contrasting thread. This helps to flatten the new seam and adds a tailored, customized look to your pants.
Related Articles

How to Add Elastic to the Ends of Pants ...
How to Alter Pajama Bottoms

How to Make a Flared Pair of Pants ...
How to Modify Yoga Pants

How to Make Tank Tops Out of T-Shirts

How to Press Jeans

How to Make a Child's Graduation Gown

How to Put on Suspenders

How to Make Mens Moccasin Boots

How to Alter Pants to Make Them Smaller ...

How to Lengthen Dress Coat Sleeves
How to Put an Elastic Band in Pajama ...

How to Sew a Dart Into Jeans
How to Lengthen Dress Pants
How to Make a Jacket From a Sweatshirt

How to Make Basic Drawstring Pants or ...

How to Hem a Sequin Dress
How to Hem a Shirt Collar
How to Put a Wedge of Fabric in the Leg ...

How to Make a Prairie Skirt
References
Writer Bio
Shelley Moench-Kelly is a writer and editor whose clients range from L'Oreal and www.Makeup.com to the McGraw-Hill Companies and FIDM. She has interviewed notables such as Dr. Andrew Ordon of “The Doctors” and the legendary Vidal Sassoon. Her first book, "Egg," is slated for release in 2016.
Photo Credits
Rob Kim/Getty Images Entertainment/Getty Images