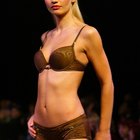
Bra inserts can create a fuller bust, push up cleavage and keep your breasts in place. Sewn into dresses, bathing suits, bras and tops, the inserts allow for extra support without the discomfort or hassle of wearing a standard bra. They're also a great bra substitute when you're wearing tops or dresses that feature low-cut backs or strapless designs.
Choose a pair of bra pads that are close in color to the piece of clothing you'll be sewing them into. For dark colors, go with black; for lighter colors, select white or beige. Also decide on the shape of the bra inserts and how much padding you'll require.
Make sure the fabric of the clothing is thick enough to support bra inserts. Ideally, the fabric should be lined, so that the stitching will not show on the outside. This will also ensure a strong foundation for securing the bra pads.
Pin the bra inserts into the article of clothing. Be sure to position them correctly based on their shape: Some bra inserts are rounded, while others are more triangular. Pin from the outer part of the garment so that you can try it on to ensure correct placement before permanently sewing in the bra pads.
Using matching thread, sew around each pad, employing an overhand stitch. Begin on the inside of the clothing; push the needle through the bra insert and into the first layer of fabric (or just catch a few of the fabric's threads), making sure you cannot see the stitches on the outer part of the garment. Bring the needle and thread back to the pad and push through again, and then into the fabric. Continue around the entire pad, spacing the stitches about 1/4" apart.
Make a few knots at the end of the thread and cut past the knotted part to keep the stitching from unraveling. Your bra inserts are now permanently secured.
Related Articles

How to Make a Flared Pair of Pants ...
How to Hand Wash Padded Bras

How to Decrease the Padding in a Bra

How to Make a Bullet Bra

How to Make a Nurse Costume for a ...

How to Keep Your Side Bra From Showing

Turning a Shirt Into a Tank Top for Men
How to Repair a Rivet Type Button on ...
How to Put a Wedge of Fabric in the Leg ...
How to Get Fuzz Out of Polyester
How to Stop a Heel Slip

How to Narrow Wide Pants

How to Make a Muscle Shirt Out of a ...

How to Make Shirt Garters
How to Keep the Elastic in a Waistband ...

How to Cut Skinny Jeans Into Cutoffs
What Does Bust Size Mean?

How to Slow Cook a Chicken Breast

How to Fix Holes in Cotton Shirts
How to Sew slippers
Writer Bio
Nicole Canfora is a freelance writer and copy editor located in Northern New Jersey with 14 years of journalism experience. Her work has been published in In Touch Weekly, Quilts, Quick Quilts, Vicinity and The Star-Ledger. She is the author of Images of America: Belleville, published in 2002.