Hemera Technologies/PhotoObjects.net/Getty Images
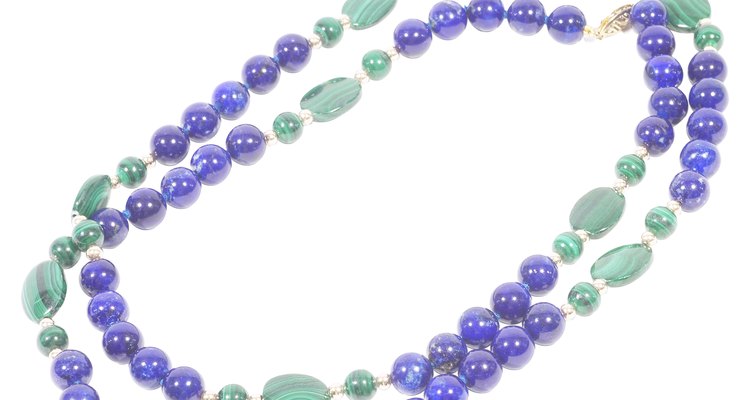
You can often repair a broken bead necklace depending on the materials and technique used to create the piece of jewelry. You will need to restring the necklace if it breaks in the middle of a strand of beads. If your necklace breaks at the beginning or end of the beads, you might be able to salvage the whole string or wire itself.
Repair the End
Repair the end of a wire beaded necklace by replacing the crimp tube, or "crimp bead," and the clasp. If the wire that is attached to the crimp bead breaks and you lose the clasp, cut the wire just below the crimp bead with wire cutters. You may need to sacrifice a bead or two at the end if you want to salvage the necklace.
Feed the bead tube onto the end of the wire and then feed the loop at the bottom of the clasp onto the wire. Feed the wire back down through the crimp bead to create a loop that will hold the clasp.
Slide the crimp bead down closer to the loop of the clasp. Clamp the crimp bead between the jaws of the crimping pliers and squeeze tightly. Trim off the excess wire with your wire cutters.
Restring
Purchase the same gauge of wire that your necklace was made from if it broke in the middle. If your necklace used elastic or nylon string, purchase that instead.
Remove both ends of the clasp from the broken necklace so that you can reuse them. If the clasps are held on by jump rings, open the jump rings by pulling the two open ends away from each other with two pairs of pliers. Grip one end of the opening of the jump ring in a pair of chain nose pliers and do the same on the other side. Pull ends from side to side, not straight out. Set these pieces aside.
Cut a piece of the wire or string the same length as the original necklace. Feed a crimp bead onto the end of the wire, followed by one end of the clasp, and then loop the wire back down through the crimp bead. Slide the crimp bead down closer to the clasp and trim the excess wire.
String the beads onto the wire in the same pattern as before. Repeat the adding of the crimp bead and clasp that you did in Step 3.
Related Articles
How to Fix a Gold Necklace

How to Extend a Toggle Clasp Bracelet

How to Adjust Stainless Steel Bracelets
How to Make a Wedding Core Lasso

How to Fix a Broken Elastic Bracelet

How to Shorten Bracelet Chains

How to Tie Shoelace Belts

How to Make Agate Jewelry

How to Fasten Double D-Ring Belt Buckles

What Is a Pendant Enhancer for Jewelry?

How to Repair Ear Gauges

How to Mend or Replace a Broken Zipper ...
How to Replace Pull Tabs on Zippers

How to Remove Studs & Rivets From Jeans

How to Take Out a Nose Ring With a Ball

How to Remove a Tongue Ring

How to Repair a Plastic Zippper

What Is a Slave Bracelet?

How to Fix a Broken Umbrella

How to Glue a Leather Shoe Strap
References
Writer Bio
Angela Neal is a writer for various websites, specializing in published articles ranging from the categories of art and design to beauty and DIY fashion. Neal received her Associate of Arts in administrative assisting from Bohecker College.
Photo Credits
Hemera Technologies/PhotoObjects.net/Getty Images