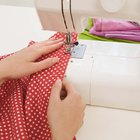
The bell skirt's distinctive feature is its shape -- in this pattern, that shape is achieved through the use of elastic-edged scalloping and a gathered petticoat. The use of elastic also means you don't need advanced sewing skills or extensive tailoring to create this look. The skirt's petticoat is designed as a dropped-waist modified dirndl -- it is another easy-to-sew method of creating the skirt's bell shape. This youthful, daytime look would look best sewn in a light or brightly patterned cotton.
Measure the wearer’s hips. Divide the measurement by pi (roughly 3.14). Cut a string the length of the measurement divided by pi, plus 2 inches. Use one of those extra inches to tie one end of the string around a pin and the other extra inch to tie the other end of the string to a marker.
Lay the patterned fabric wrong side up. Place the pin at the approximate center of the top edge of the patterned fabric, so the pin stabs into the fabric and stands upright. Stretch the marker as far from the pin as it will go – keeping one finger on the pin to keep it in place, if necessary – and use the marker to draw a semi-circle onto the fabric.
Measure the length from the wearer’s hips to where she wants the skirt to stop on her leg (that’s likely to be roughly 18 inches). Add that length to the measurement of the string used to draw the first semi-circle, and cut a string to that new length.
Repeat the process of tying the string to a pin and marker, placing the pin onto the same spot on the fabric, and drawing a semi-circle onto the fabric – this semi-circle should run parallel to the other one, like rings in a lake. Cut along the marked lines – the fabric should now be in the shape of a semi-circle with a smaller semi-circle cut out of the middle top of it.
Repeat the same semi-circle drawing process on a piece of plain cotton, first with the original string length (radius of the hip measurement plus 2 inches), and then with another length of string that is 5 to 6 inches longer than that. Cut out the semi-circle you’ve just drawn.
Sew the two straight edges of the patterned fabric semi-circle together, using a zigzag stitch, so that the fabric makes a loop – it should be shaped like a doughnut. Hem the bottom edge of the skirt in a blind stitch.
Flip the skirt wrong side out. Decide whether you would like the skirt to have four or eight scallops. Pick up the skirt and fold it in half, so it’s bell shaped. Fold it in half – keeping the bell shape – once more for four scallops or twice more for eight scallops. Mark the fabric from waist to hem on the line of the folds.
Measure the length of a fold with the measuring tape. Cut as many pieces of elastic as there are waist-to-hem marks on the skirt, each to the length of the fold’s measurement plus 1 inch. Pin the elastic to the marked lines. Sew the elastic to the marked lines, making sure to meanwhile stretch it along the line.
Measure the wearer’s waist, in order to make the pattern for the underskirt.
Draw a rectangle onto pattern paper. Make the rectangle as wide as the wearer’s waist measurement, plus 10 more inches to give the skirt room to gather and plus another 5/8-inch seam allowance on either side (the measurement of the waist, plus 11 1/4 inches). Make the length of the rectangle as long as the length between the wearer’s waist and where she wants the skirt’s hem to fall.
Cut out the skirt body rectangle pattern piece. Lay the pattern piece on the wrong-side-up patterned fabric, trace around it and cut out the rectangular piece of fabric. Repeat for a second rectangular piece of fabric.
Sew the two rectangular pieces into a continuous loop. Sew the semi-circular piece of plain cotton so it is a circle; it should be shaped like a doughnut. Pin the loop of patterned fabric to the outer ring of the plain cotton circle. Gather the loop’s fabric as you go, and evenly distribute the gathers. Sew the loop onto the plain cotton circle where you’ve pinned it; this creates a modified dirndl skirt.
Pin the scalloped bell skirt top piece over the dirndl skirt, so the hemlines are layered how you’d like them to look (they might be layered evenly or the modified dirndl might extend past the bottom scallops). Hem the bottom of the of the dirndl skirt using the blind stitch to the length you’d like, using as thick a hem as possible (to aid the fabric’s ability to drape). Sew the two skirts together where they’re pinned.
Draw another rectangle onto pattern paper. Make the rectangle as wide as the length of the wearer’s waist measurement plus 1 inch for comfort, plus another 5/8 inches on either side as a seam allowance (the measurement of the wearer’s waist, plus 2 1/4 inches). Make the rectangle 1 1/4 inches wide, with 5/8 inches on either side for a seam allowance (2 1/2 inches wide). Cut out the waistband rectangle.
Lay the waistband pattern piece on the wrong-side-up patterned fabric, and cut out around it, then repeat so you also have two matching pieces for the waistband. Sew the two pieces together length-wise.
Arrange the waistband over the top of the skirt so the waistband overlaps the top of the skirt both on the front and the back. Fold the waistband fabric so the rough edge is folded up into the waistband and is hidden from view (as though you’re going to hem it). Pin it in place, and sew – leaving the first and last inch of the band unattached to the skirt. Hem all around the first and last inch of the band.
Put the skirt on the wearer, and mark where eyelets should go so the waistband fits snugly but with some allowance for comfort. Sew the eyelets on to the flaps of the first and last inch of the waistband.
Related Articles

How to Make a Petticoat Slip for a ...

How to Make Leeloo Suspenders

How to Make Kilts

How to Make a T-Shirt More Feminine

How to Make a Prairie Skirt

How to Make a Pancake Tulle Skirt

How to Narrow Wide Pants

How to Make a Children's Folklorico ...

How to Put a Wedge of Fabric in the Leg ...

How to Make a Girl's Dress by Adding a ...

How to Turn Boxer Briefs Into Briefs

How to Make a Twirly Skirt

How to Tie a French Bustle in a Wedding ...

How to Style a Plain V-Neck Shirt

How to Make Apache Moccasins

How to Make a Pageant Shell

How to Roll My Pants Up Really Tight at ...

How to Make a Satin Waistband Tutu

How to Iron Dress Blues

How to Put an Elastic Band in Pajama ...
References
Writer Bio
Sasha Rousseau began writing in 2003. She won the best fiction award from "Thoroughfare Literary Magazine," placed in the Sir Martin Gilbert Churchill National Essay Competition and has been published in the "Washington Post." She graduated magna cum laude with a Bachelor of Arts in writing seminars and English from Johns Hopkins University.
Photo Credits
Jupiterimages/Photos.com/Getty Images