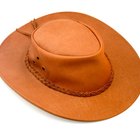
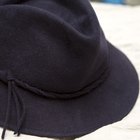
Hats are helpful for keeping the sun out of your eyes and rain off your face. Tilley hats are loose fitting and made with light-weight cloth fabric with a short brim. Tilley hats are helpful for keeping your face shaded and cool during hot days. Tilley hat chords are adjustable and loop loosely around your neck to keep them from blowing off in the wind. The chords are simple to insert and easily replaceable.
Insert one end of the chord into the first of two eyelets on the left side of the hat. Ensure the chord is at least 12 inches long so it can hang loosely under your chin. A thin, elastic chord -- such as a shoe string -- is a wise substitute, if one is necessary.
Flip the hat over so you are looking at the inside. Tie a knot in the very end of the chord you just inserted so it is too big to pull back out.
Loop the other end of the chord -- from the outside of the hat -- through the second eyelet on the left side. The other end of the chord is now on the inside the hat.
Push the end of the chord through the second eyelet on the right side of the hat. The chord is now on the outside of the hat again.
Loop the chord through the first eyelet on the right side of the hat. The chord end is now, once again, on the inside of the hat. Tie a small knot in the end of the chord so it cannot be pushed back out.
Place the hat on your head. Be sure the chord loops down in front of your neck. Squeeze the chord together at the bottom of the loop and insert the chord through the hole in a small bead. Tie a small knot in the sliver of chord sticking out from the bottom of the bead so the bead cannot be removed. Push the bead up or pull the bead down, as necessary, to adjust the tightness of the chord.
Related Articles

How to Attach Stampede Ties to a Cowboy ...

How to Keep Your Hat on Your Head ...

How to Put on Cowboy Hat Bands

How to Restore the Shape of a Floppy Hat

How to Stiffen the Brim of a Cap

How to Make a Cowboy Hat Larger
How to Make a Bandana Hat

How to Shape & Resize a Leather Cowboy ...

How to Get Creases Out of a Canvas Hat
How to Remove Jibbitz on Crocs
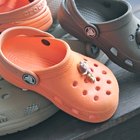
How to Put on Croc Charms

How to Tie My Converses Behind the ...
How to Stretch a Leather Hat

Types of Scottish Hats

How to Break in a Cowboy Hat

How Can I Make a Straw Hat Smaller?

How to Protect Your Hairdo in the Wind

How to Tie a Baptism Bonnet
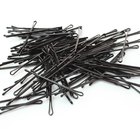
How to Keep Your Hat on With Bobby Pins
Ideas for Decorating a Hat
Writer Bio
Jeffery Keilholtz began writing in 2002. He has worked professionally in the humanities and social sciences and is an expert in dramatic arts and professional politics. Keilholtz is published in publications such as Raw Story and Z-Magazine, and also pens political commentary under a pseudonym, Maryann Mann. He holds a dual Associate of Arts in psychology and sociology from Frederick Community College.
Photo Credits
boots image by Aleksandr Ugorenkov from Fotolia.com