
Men’s baseball caps are a common accessory to the casual look of men’s style. This fashion trend began with official baseball uniforms, but soon moved into the general population as fans started wearing them to show their support to their favorite teams. Fans also enjoyed the added benefit of the sun visor as well and soon they were wearing them in places other than baseball fields. Today men wear baseball caps for every day wear as well as to show team loyalty. If you make your own men’s baseball cap, you can personalize it with fabric choice, color and appliqués as well as team logos.
Preparation: Make the Pattern and Cut the Fabric
Measure around your head with the tape measure where the cap will rest for the cap size. Keep the tape measure loose so that the cap will not be too small after sewing. Write this number down on a piece of paper.
Measure across the front of your forehead from temple to temple for the visor measurement. Write this number down on a piece of paper.
Draw a circle on the newspaper that is slightly bigger than the cap size measurement. Use the compass to make sure your circle is perfectly round. Divide the circle in quarters with a ruler or straight edge.
Cut the circle out. You need the newspaper pattern piece to ensure proper measurement and cutting of the pattern. It is also easier to cut fabric from a paper pattern.
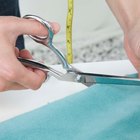
Pin the circle pattern piece onto the fabric and cut it out. Then cut along your dividing lines so that you have four triangles with curved edges. Do the same with the lining fabric.
Draw a rectangle that is the length of the visor measurement and five inches wide. Use a ruler to make sure your lines are straight. Fold the rectangle in half and cut around the top corners to make the curved shape for the visor.
Assembly
Stack the four triangles on top of each other so that they are perfectly aligned along all edges. Cut a small opening near the point of each triangle with the tip of your scissors. You can also use a nail and hammer to make the holes. Make sure the holes are far enough down that they will not get caught in the seams when you sew the pieces together.
Sew the four sections together with right sides together. Sew one seam at a time, adding one section at a time. Press all seams open.
Repeat the above steps with the lining fabric.
Lay the lining cap piece on top of the hat piece, right sides together. Match the seams carefully. Sew around half of the bottom of the hat. Turn right sides out and press.
Attach one open button into the holes in each of the four sections according to the directions on the package.
Attach the one closed button to the center top where all the seams meet.
Fix the interfacing to the wrong side of one of the visor pieces according to the product directions.
Sew the two pieces together around the edges, right sides together. Leave the straight edge open. Turn right sides out and press.
Attach the visor to the hat, right sides together, along the open edge of the hat and the straight edge of the visor. Leave the lining of the hat loose.
Fold the lining under at the edge along the visor and hand sew it into place.
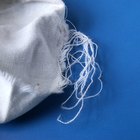
Remove all basting and trim all loose threads.
Related Articles
How to Make a Railroad Conductor Hat

How to Put Rank on an ACU Cap
How to Make a Dew Rag

How to Decorate Graduation Caps

How to Cut Up a Shirt for the Gym
How to Stop Sweat from Staining Golf ...

How to Lengthen Dress Coat Sleeves
How to Attach Rivets in Fabric
How to Make Fleece Gloves
How to Make Victorian Bonnets

How to Make Tank Tops Out of T-Shirts

Instructions for Sewing a Dashiki

How to Make Renaissance Hats

How to Clean an Electric Self Shaver

How to Make a Kid's Indian Costume From ...

How to Make an Easy Child's Colonial ...

How to Cut Sneaker Shields
How to Make a Pirate Hat From a Bandanna

How to Make Suspenders Longer

How to Put Your Cap Badge on Your Beret
Writer Bio
River Lin is an independent writer and consultant. With a Master's degree in teaching English as a second language from Ball State University. She lived in Japan for 15 years teaching and editing. Now based in the US, she works for a variety of clients. Published work can be found in print and online at various websites and goarticles.com.
Photo Credits
handsome guy with a smile image by monamakela.com from Fotolia.com