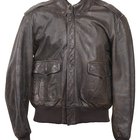
Leather jackets can be durable, stylish additions to your wardrobe, but they can also be easy to damage. Because leather is made from animal skin, it's already porous, so a minor blemish can speed up the deterioration of your coat. Doing any work on your jacket can be delicate, particularly when you're taking out stitches that will leave needle marks on your coat. Removing sewn-on patches can be particularly difficult, since they're often glued as well as stitched to the jacket.
Turn the jacket inside out to check if the patch is sewn through the leather into the lining of the jacket. If it's not, find the seam where the lining is attached to the jacket.
Use your seam ripper to carefully remove the stitches that attach the lining to the coat. Turn the coat inside out so that you're looking at the backside of the leather. Find the stitches that attach the patch to the jacket.
Slide your seam ripper under each stitch as delicately as possible, and remove each individual stitch. Every stitch in the leather will leave a hole, so you do not want to make the hole any larger. You must remove every stitch before you can pull the patch off, or you risk ripping the holes.
Pull the patch off once you remove all the stitches. If it does not come off, the patch was in all likelihood put in place with both adhesive and stitches. Carefully pry up as much of the patch as you can, and spray WD-40 under it. Reader's Digest says that WD-40 will not only help remove adhesive, but will also condition leather too.
Apply a larger patch to cover the holes if they're too big or unsightly. Alternately you could use a leather repair kit to fix them.
Related Articles
How to Repair a Leather Jacket Lining

How to Repair a Torn Lambskin Leather ...
How to Repair Cigarette Burns in Leather

How to Fix a Ripped Shirt
How to Remove a Stamp on Leather
How to Attach Patches to Leather ...

How to Patch a Waterproof Rain Jacket

How to Comb the Furry Hood of a Jacket

How to Repair Fur Coats
How to Repair Sheepskin Slippers

How to Lacquer Leather

How to Fix Holes in Stockings
How to Repair a Leather Jacket Lining
How to Fix Ripped Rubber Boots
How to Condition a Dried Leather Biker ...
How to Fix Tears in Down Coats
How to Fix a Mink Coat Whose Pelts Are ...
Fixing Moth Holes in Wool Suits
How to Patch Small Holes in Polar Fleece
How to Repair Rubber Boots