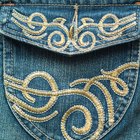
Take jeans from blah and boring to super stylish with a fancy rhinestone re-do. Whether you want to embellish a new pair of jeans to fit your latest fancy or are looking to jazz up worn-looking denim from the back of your closet, gluing rhinestones onto your pants can create a custom transformation. Glue on an abstract design, make your own imaginatively intricate pattern or use a ready-made stencil to plot out your super-shiny rhinestone-clad style.
Step 1
Try on your jeans in front of a full-length mirror. Choose a design to plot out on your pants. Using a washable pen or marker, draw out the plan. If you can't free-hand it, use a stencil to map out the pattern. Take the jeans off and add the rest of the design to the back side of the denim.
Step 2
Insert cardboard between the layers of denim to create a barrier that will stop glue from seeping through. Lay the jeans flat, with the cardboard in the middle, on the work surface.
Step 3
Pour a golf ball-sized pool of fabric glue onto a paper plate. Dip the end of a toothpick into the glue and dot it on the denim where you want the first rhinestone to go.
Step 4
Press a rhinestone firmly onto the glue. Remove any excess that squeezes out around the edges with a clean toothpick. Continue with this process until you cover the entire front-side design. Allow the glue to dry overnight.
Step 5
Turn the jeans over, keeping them flat on the work area. Pour a new plate of glue. Repeat the dipping and pressing steps for the back side of your jeans. After you finish, set the jeans aside to dry again overnight.
Step 6
Wait 24 hours before wearing the jeans to provide ample time for drying. Remove the cardboard from the inside of the jeans and discard it.
Related Articles

How to Stretch Out Cutoffs

How to Repair a Rivet Type Button on ...

How to Print on Denim

How to Stretch Out My Jeans Under the ...

How to Fade & Distress My Jeans

How to Bleach a Black Shirt Gray

How to Get Fashion Tape Off of Clothes

How to Press Jeans

How to Get Wrinkles Out of Denim ...

How to Get Sticker Residue off of Jeans

How to Get Primer Out of Jeans

Tie-Dye Techniques With Bleach

How to Distress the Bottoms of Jeans

How to Fix Holes in Pantyhose

How to Stretch Jeans Out in the Waist

How to Get the Hem Crease Out of ...

How to Fix a Hook on Pants

How to Remove Permanent Marker From ...

How to Make Tank Tops Out of T-Shirts

Removing the Pocket Stitching on Levi's
References
Tips
- It's not uncommon for glued-on rhinestones to occasionally fall off. Simply set aside a few extra stones and glue them on to replace any fallen ones.
- Choose an array of colors, shapes and sizes to add visual interest to the jeans.
- Stick to the borders of the jeans if you're going for a simple embellished look. For a look with more pizzazz, stick to the borders of your jeans. Bling-out the edges of the back pockets or make a line next to the side seams.
Warnings
- Don't machine wash the hand-made rhinestone jeans. The gentle bond between the stones and the denim may not hold up in a thrashing washer or heated dryer. Instead, go with a light hand-washing.
- Avoid washing the jeans at all until one week after you've embellished them. This will provide time for the glue to set.
Writer Bio
Based in Pittsburgh, Erica Loop has been writing education, child development and parenting articles since 2009. Her articles have appeared in "Pittsburgh Parent Magazine" and the website PBS Parents. She has a Master of Science in applied developmental psychology from the University of Pittsburgh's School of Education.
Photo Credits
Thinkstock/Comstock/Getty Images