
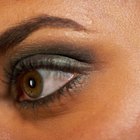
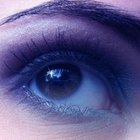
While that supermodel may spend hundreds of dollars having her eyebrows professionally waxed or threaded, many women opt for the convenience of doing it themselves at home. Stencils take the guesswork out of eyebrow grooming. Making your own custom eyebrow stencils ensures your eyebrows are the perfect shape for your face.
Either download a template online or draw your own on regular printer paper. You will need two, one for the left side and one for the right.
Lay the overhead transparency film over your template and outline each template with the ballpoint pen, pressing down firmly.
Slowly and carefully cut along the grooves left by the ballpoint pen with the exacto knife. With the scissors, cut out the stencils, leaving about ¼ inch around the negative pattern.
To tweeze your brows using your new stencils, select the plastic stencils that you poked out from the transparency film. Dot with eyelash glue and let set 30 seconds, until the glue is tacky. Align each one on clean eyebrows and pluck around the stencil.
To fill in your eyebrows with your stencils, choose the rectangular stencils and dot with eyelash glue. Once the glue is tacky, center each one on your brow bone and fill in with an eyebrow pencil or powder.
Related Articles

How to Get Your Eyebrows to Lay Flat
How to Make Nail Stencils

How to Unclump Eyelashes

How to Put on Beautiful Bottom Lashes
How to Make a Paper Bouquet Holder

How to Put an Acrylic Nail Back on ...
How to Line Your Mustache

How to Put on Eyeliner for the First ...

How to Pluck Eyebrows for Beginners
How to Feminize Your Eyebrows

How to Remove Hairspray From Wigs

How to Keep Breaded Baked Pork Chops ...

How to Have Eyebrows Like Marilyn Monroe

How to Trim the Length of False Lashes

How to Bake Messages Into Cupcakes

How to Create Bold and Separated ...

How to Make Toasted Bread Sticks With ...
How to Thin Out Your Eyebrows
How to Repair Eyeglasses With a Broken ...

How to Wax Your Own Eyebrow With ...
References
Writer Bio
Mona Sawyer began professionally writing online content in 2010. She enjoys software programming and authoring computing guides for beginners in the field. Sawyer is studying computer science at Tidewater Technical College.
Photo Credits
Hemera Technologies/AbleStock.com/Getty Images