
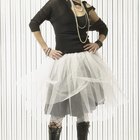
Cheerleading including megaphones, pom poms and of course, the illustrious skirt. Create a cheerleader skirt for your daughter's cheer team, or even a Halloween costume, in no time at all. Even if you are not an experienced sewer this project will prove not to be too difficult.
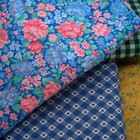
Cut four pieces of each contrasting color pattern (we'll call the contrasting colors 3 and 4 to make things easy): 3(4-1/2" x 13") and 4 (13" x 4"). " = inches.
Cut two pieces of each of the main color pattern (label these 1 and 2 to remember) 1 (10" x 3") and 2 (6" x 13").
Sew #1 pieces of fabric facing at side seams.
Sew pieces 2, 3 and 4 together to form each side of the skirt. Sew one right next to the other. The pleats will be added next so don't worry if the color blocks seem off from each other.
Add the pleats. Make pleats on the front and back of the cheerleader skirt. Fold carefully along the smaller contrasting color bringing the fold on each side to the main sewing line. Be sure to stitch along the top edge of pleat. This edge will look raggedy and unfinished which is why you sew there to cover this part.
Sew the front and back skirt pieces together at the side seams that have been created. With the sides together, pin the skirt matching the center and side sections.
Turn the skirt right side out and now sew along the top of the skirt. To add the elastic fold the end of the top of the skirt under 1 inch to create a space to put the elastic. Sew along the edge of the border leaving the sides open for the elastic at each end. Then,insert the elastic and push through all the way. Sew the ends together.
Related Articles

How to Make a Children's Folklorico ...

How to Make a Can-Can Costume

How to Sew Tube Dresses
How to Make a Cool Tattered Skirt

How to Hem a Sequin Dress

How to Boil Celery
How to Make a Twirly Skirt

How to Season Flour for Fried Chicken
How to Make a Jacket From a Sweatshirt
How to Make a Satchel
How to Make a Wedding Shawl
How to Make a Baked Stuffing
How to Sew a Nightgown

How to Dress a Big Stomach & Small Legs

How to Make Japanese School Uniforms

How to Narrow Wide Pants

How to Make Suspenders Longer

How to Wear a Women's Pantsuit to a ...

Sheath vs. Shift Dresses

Can You Boil Broccoli & Carrots at the ...
Writer Bio
This article was written by the CareerTrend team, copy edited and fact checked through a multi-point auditing system, in efforts to ensure our readers only receive the best information. To submit your questions or ideas, or to simply learn more about CareerTrend, contact us [here](http://careertrend.com/about-us).
Photo Credits
NicoleWilkins