ALLEKO/iStock/GettyImages
These Revised Family Classics Are Easy and Travel Well
Everyone loves reunions' greatest hits: the casseroles, salads, pies, fried chicken and so on. Why not add your own twists to a few classics this year?
Words to the Wise Traveler
Optimally, a travel-friendly dish shouldn't be concerned with staying cool. It could remain in its pot, pan or box no matter the temperature and be just fine until it arrived at the family homestead in the same perfect condition as when it left your house. But this scenario is a bit unrealistic and in any case severely limits your choices, especially if you're traveling long distance. Even foods as seemingly impervious to temperature as crudites or cookies may arrive limp, broken and generally bedraggled after their journey. This is not to mention the fact that one of the most difficult feats in the culinary world is to keep an unenclosed dish level and un-joggled whether it's taking a car ride, an airplane flight or a railroad journey.
If you don't own a good, solid, airtight cooler with a flat bottom, get one. You're guaranteed to find many more uses for it as the years go by. You will also need freeze-packs. Unlike the old days, when these helpful little articles were petroleum-based, you can now buy a variety of inexpensive and environmentally-friendly freeze-packs that keep your dishes cooler for a longer period of time. Of course, you could dump a bag of ice into the cooler, and that might be just fine if you're loading it up with bottles of beer or soda. But for solid food, not so much. You know you'll open that cooler and find a soggy mess.
Here are a few ideas for travel-friendly dishes.
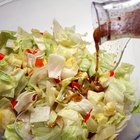
Is it a Salad or a Centerpiece?
Everybody loves layered Tex-Mex dip, so why not try a layered Tex-Mex salad? It's easy, it's tasty and it's even quite pretty when presented in a clear covered salad bowl with all those layers showing off their colors. You can make the salad the night before, leave in the fridge overnight and be ready to go the next day.
All you have to do is choose your idea of a good combination of ingredients that can hold up to layering. Possibilities could include black beans or kidney beans (canned are fine, just drain them), fresh or frozen corn, black olives, fresh or sundried tomatoes, shredded cheese, chopped jalapeno peppers, fresh cilantro—let your inner chef be your guide. If you decide to include tortilla chips, don't put them between two juicy layers; they'll just turn into mush. For a dressing, just pick up your favorite from those available in the produce section of your supermarket. There are some delicious varieties to choose from these days that would work well with a Tex-Mex combo, so save yourself the extra work of making it yourself.
Pack the covered salad in your cooler. You won't be adding the dressing till it's ready to serve. Make sure that the cooler is stable and everything in it is level. When ready to serve, drizzle the dressing over the salad. It's an edible work of art!
The Waldorf Isn't What It Used to Be
Almost everybody knows how to whip together a Waldorf salad; it's just a simple combination of chopped apples, walnuts, celery and dressing. Some folks add grapes.
Why not try swapping out some of the ingredients for others that your inner chef finds appealing? Try different fruits: for example, how would pears work? Consider the possibilities offered by Asian pears or canned lychees or blueberries or whatever is in season (and won't come apart in the salad). What about trying out a different sort of nut? Would pecans or macadamia nuts make the salad richer? Instead of celery, cut peeled jicama into strips or use strips of carrot or mild peppers. Would dried cranberries, cherries or raisins fit into your concoction? Instead of the usual mayonnaise, mix a little honey into plain yogurt, along with a little lemon or lime juice. Whatever you do, add some amount of citrus or an acidic element (such as an aromatic vinegar) so that the fruits don't turn brown. Keep in the refrigerator until it's time to leave, then take it in the cooler.
Make a small batch (or a few small batches) of likely combinations ahead of time. These you can taste-test yourself. Create a salad you can call your own, one you'll be proud to add to the family table.
Happy Trail Mix to You, Until We Meet Again
Let's say you want to bring something "snacky" but not the old chips-&-dip combo. Trail mix would be a good choice, but those pre-mixed packages are usually on the small side and expensive. Instead, use your imagination and taste-buds to create your own one-of-a-kind blend. Head to a supermarket that has bulk bins so you can put together your own selection of nuts, dried fruit, chocolates, little pretzels and what-have-you. Consider doing a trial batch first, with all the ingredients but in lesser quantities.
Fill the bags provided by the supermarket with as much of your super-duper trail mix ingredients as you like in what you think would be the perfect proportions. Get them home and mix them up. Taste to make sure your mix is as good as can be, then pack either in one big covered bowl or in individual bags tied up with ribbons (the kids will especially like these!).
Hummus Is Where the Heart Is
Hummus—that tangy, creamy spread that comes in a variety of flavors in those little plastic tubs in your supermarket—may look slightly exotic, but it can be easily made at home. There are a few basic ingredients, but after you put those together you can finish up your dish any number of ways. The basics are drained, canned chickpeas, tahini (1 part tahini to 6 parts chickpeas) and lemon juice (1 part juice to 6 parts chickpeas). Mash the chickpeas either with a potato masher or in a food processor. The tahini (usually found in the international aisle of the supermarket) comes already mashed but should be whipped with the lemon juice before combining with the chickpeas. Mix everything together with little olive oil, salt & pepper, and there you have it: basic hummus.
There are variations of basic hummus that you can look into, mostly having to do with seasoning. Try adding cumin, crushed garlic, curry powder, Hungarian paprika (the hot kind) and/or a Mediterranean herb mix. Taste as you go. You don't want it to be either too hot or too bland. Also, if you can't find tahini locally, substitute peanut butter; buy natural peanut butter with no additives.
When you're satisfied with the taste and consistency of your homemade hummus, spread it into a glass or pyrex container with high sides; you need the high sides since you'll be adding another layer of flavor. And what will that layer be? If your supermarket has an olive bar, get yourself a few different varieties, chop them up and sprinkle on top. If it has a salad bar, pick out small portions; marinated veggies are a good choice. Or you could buy a jar of roasted red peppers. Another idea is sun-dried tomatoes (re-hydrate them before use). When you're happy with your choices, spread them on top of the hummus. You don't need to mix everything together hodgepodge; instead, make sections or even try a colorful design.
Now the hummus should be ready to pack. Grab a box or two of multi-grain crackers to take along, and you're all set to go.
Whatever you decide to bring, enjoy everyone's contribution, including your own. Have a great potluck and a very happy reunion!
Related Articles
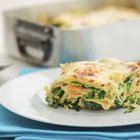
Menus With Vegetable Lasagna
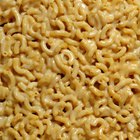
Foods to Eat With Baked Mac & Cheese

How to Serve Ravioli
What Sides Go With Barbecue Chicken?
Meal Plan for Clam Chowder
How to Plan a Buffet Menu
How to Buy and Use Capers in Cooking
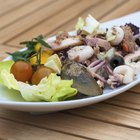
How to Make Seafood Salad
Meals That Go Great With Pasta Salad

Ranch Packet Substitute

How to Match Vests With Pants

What Color Shoes and Socks Go With an ...
How to Make Perfume With Pumpkin & ...
How to Store Homemade Salad Dressing

Does a Casserole Bake Faster Covered or ...
Easy & Fancy Appetizers
How Far in Advance Can You Make ...

Pairing Food With a Super Tuscan Wine
How to Wrap Tortillas in Foil
How to Keep Fruit Salad Fresh
Writer Bio
Judith loves cats, books, and road trips with her husband. She was born in rural Indiana, studied English Literature at the University of Chicago, and has lived in Chicago, Boston, Deerfield, MA and now Louisville, KY. She owned a bookstore for several years and is a past-president of the Mass. & RI Antiquarian Booksellers. She edits novels and stories, and makes pictures which have been shown in galleries and juried shows. She loves to write, and her motto is "stay curious."