
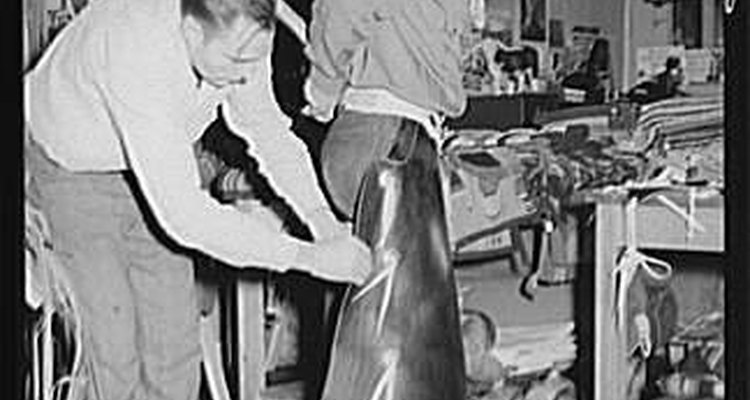
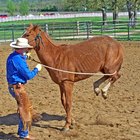
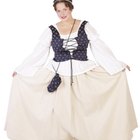
Chaps are work clothes worn by men, and some women, to protect clothing and parts of the body when working on ranches. Most chaps are designed to take abuse and hard wear, but some pairs are simply decorative. "Show chaps" are designed for flash, decorated with silver inlay and trim, and often are made to match horse saddles and boots.
Measure for the pattern. The key to a good fit is to design the chaps from individual measurements. Measure the inseam, the waist, the hip (2 inches below the waist for women's chaps), and the thigh circumference. To determine the length of the chaps, measure both rear legs of the pant. Start with the rear measurements by recording the inches starting at 2 inches below the rear to the desired length. Take a second measure from the waist to the desired length on both sides of the legs. For nicely fitting custom chaps, measure each leg separately since one leg is usually longer than the other. Determine also the width of the legs. Dress chaps are usually wider and sometimes include additional fabric down each side. Determine the width of the chaps by measuring from the inseam of a pant leg, around the leg, to the widest part of the outside of the chap legging. This measurement will be the front panel of the chap leg.
Select the fabric. Most chaps are made of suede, real or synthetic. "Woolies" are made from sheepskin, complete with the furry wool featured on the front of the chaps. Modern chaps are made from highly processed leather, usually in black or red. If chaps are to be made of an expensive material, first make a test set from inexpensive fabric, such as heavy muslin. This will allow for the feel of the "drape" of the chaps and save money by making any alterations before cutting the suede or leather.
Make the pattern. Deconstruct a pair of old jeans. Make sure they fit well. Cut off the waist and open the legs at the seams. Lay these pieces out on a piece of craft paper or newsprint. Add a half-inch for the sewing seams. Add the measurements for the front side of the chaps to the front section of the jeans. Do not add this measurement to the rear jeans panel since the flare will be only on the front of the chaps. Cut the backside of the jeans down to the measurement taken from Step 1. Remove the inside pieces that make up the crotch section of the jeans. This area will be open when constructing the chaps. The back of the chaps will also be open. Determine a natural waistline using the jeans. Now, double the width of the waistband from the jeans. This will serve as the waistband for the chaps. The chaps will ride at the same place so adjust the fit while making the waistband pattern piece. Add an inch to each end of the waistband pattern piece. This will allow the seam necessary for sewing the waistband.
Lay out the pattern. Place the pieces made above on the fabric. Manipulate each to make the best use of the fabric. The waistband may be laid out using either the warp or woof (lengthwise or widthwise), but the leg pieces must be laid out running lengthwise on the fabric. Do not lay chaps pattern pieces on the bias (at an angle). This will provide unnecessary fabric stretching or an unmatched grain on leather or suede. The pieces should include: Two front leg pieces, two rear leg pieces, and a waistband. Avoid pinning pattern pieces to suede or leather since the pins will damage these materials. Use weights in place of pinning patterns.
Cut the fabric. Use a sharp pair of fabric shears or a rotary cutter to cut out the chaps. Confirm that each piece has at least 1/2 an inch seam allowance.
Sew the chaps. When using suede or leather, avoid pinning pieces together. This will damage the materials. Confirm that the pieces are properly matched with the finished side of the fabric on the exterior and the rougher, unfinished side to the interior side of the chaps. Lightly place blue painter's tape along the exterior leg mark. Use the jeans to determine the width. Attach the rear chap leg with a flat felt sewing technique to the natural legging mark. The wide front of the chaps will float free to the side of the leg. If no decoration is to be placed along the front side of the chaps, add a small finish seam along the exterior side of fabric, suede or leather chap that will extend to the side. Fold the seam to the back of the garment. Try on the chaps to make any adjustments (be sure to sit down to evaluate the fit on the back of each leg). Attach the waistband.
Attach hardware. Fold one side of the waistband over, folding in the belt hardware. Hand-finish both sides of the rear waistband.
Hem the chap bottoms. Hand finish or top-stitch the bottom of the chaps. Wear shoes or boots to determine appropriate height for the bottom hems. Chap tops should rest on the lower front of the boot. Rear length should be at the bottom of the boot top, at the beginning of the boot heel.
Decorate the chaps. Plan the design using pattern paper. This will help when using a matching design for both legs. Pipe the chaps along both sides or add finished seams. Attach any decorations to the front of the chaps.
Related Articles
How to Sew a Kippah

How to Make Chaps Out of Pants

How to Narrow Wide Pants
How to Clean Suede Chaps

How To Make Baggy Jeans
How to Make a Shoe for a School Project
Instructions for Sewing Basketball ...

How to Rip Jeans at the Bottom

Directions for Extending the Waistline ...
How to Make a Simple Lace Up Corset

Which Pants Look Best on a Full-Figured ...
How to Make a Lined Jean Purse

How to Make a Children's Folklorico ...

How to Hem a Sequin Dress

What Kind of Body Types Do Levi's Jeans ...
How to Line a Wedding Gown

Type of Cuts in Pants
How to Make Bed Jackets
How to Make Kilts

How to Make a Tutu Stick Out
Writer Bio
Lee Grayson has worked as a freelance writer since 2000. Her articles have appeared in publications for Oxford and Harvard University presses and research publishers, including Facts On File and ABC-CLIO. Grayson holds certificates from the University of California campuses at Irvine and San Diego.
Photo Credits
Library of Congress