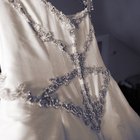
After months of searching you have finally found the flower girl dress of your dreams. There's only one problem – you've always imagined a beautiful silk sash cinching the waist, and a fluffy bow gracing the little girl's back. Don't pass up the opportunity to purchase the perfect flower girl's dress because it is missing a sash and bow. Creating one yourself is probably one of the simplest tasks you will perform in preparing for your wedding.
Measure the flower girl's waist with measuring tape.
Cut a length of silk ribbon that measures about six inches wide, and is the same length as the flower girl's waist, plus an additional 20 inches. Instead of ribbon, use any type of fabric that will fit into the theme of your wedding -- a swatch of fabric from your bridesmaids dresses, or even a favorite scarf in the proper color.
Wrap the sash around the flower girl's waist so that the ribbon overlaps just slightly, directly into the center of the back. Use a safety pin to attach it to the dress by first pushing the pin through the ribbon, then through the dress, back out through the dress and the other side of the ribbon before securing the clasp. This will most likely be where the bottom of the zipper is located; if this is the case just make sure the zipper is zipped up before attaching the ribbon. Cut off the additional ribbon.
Form the remaining ribbon into a bow with eight inch tails on each side, and push a safety pin through the center to hold it in place.
Pin the bow to the sash in the center of the back, making sure to cover the safety pin holding the sash to the dress.
Related Articles

How to Tie a French Bustle in a Wedding ...

How to Fold a Dress Shirt to Avoid ...

How to Make Indian Wedding Garlands

How to Sew Your Own Beads on Your ...

The Difference Between a Corsage & ...

How to Make a Can-Can Costume

How to Pin a Homecoming Mum

How to Put a Boutonniere on a Shirt

How to Wash a Tulle Fabric Party Dress

How to Decorate a Gazebo With Wedding ...

What Do Chinese Women Wear?

How to Make a Bridal Cape for a Wedding ...

How to Make a Puffy Tulle Dress

How to Donate a Wedding Dress in Canada

Wrap Dresses Instructions

How to Make a Baby Crib Canopy Out of a ...

How to Make a Nurse Costume for a ...

How to Deodorize a Prom Gown at Home

How to Make a Presentation Bouquet

How to Wear a Scarf With a Brooch
References
Writer Bio
Danielle Hamill began writing in 2007 for website developer Interactive Internet Website, Inc. She has contributed to websites such as Family Travel Guides and Caribbean Guide. Hamill holds a Bachelor of Arts in English from Florida State University.
Photo Credits
Brand X Pictures/Brand X Pictures/Getty Images