
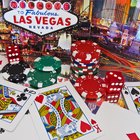
The “Welcome to Las Vegas” sign, which was created in 1959, according Vegas.com, is an iconic landmark that is synonymous with sin city. This iconic sign that stands on Las Vegas Boulevard welcomes visitors to the vibrant desert city and images of the colorful illuminated sign adorn tourism publications. Creating your own version of the Las Vegas sign could be a fun addition to a room in your home or a great decoration for a Las Vegas-themed party or a casino night.
Find pictures of the actual sign as a point of reference for your homemade version. You can search for images online, in books, or print material about Las Vegas. Print out or keep this picture on hand during the construction of your sign.
Choose your materials based on the size and durability you would like in your sign. If you are seeking something disposable for a one-time-use situation, paint your sign directly on a large piece of paper or opt for something more substantial like cardboard. If you want to create a more durable sign, use wood, but this will elevate the difficulty of the project as you will need to cut the wood in the shape of your sign.
Cut out the main part of your sign in your material of choice, mirroring the rounded diamond shape of the original. The actual sign measures upwards of 25 feet, according to Dimensions Guide, but you can size your sign to specifically fit your needs.
Use your base material -- paper, cardboard or wood -- to cut out the seven circles for each letter of the word “welcome” and the red star that perches above the sign. Attach these elements to your sign with a strong glue or nails.
Sketch out the lettering and placement of all of the elements on the sign using a pencil that can be erased if necessary. Use this as a guideline to make all of the elements line up in an accurate manner.
Add color to your Las Vegas sign by coloring in the elements with paint. Acrylic paint is a good multipurpose paint that works well on most surfaces and is easy to clean up. If you are staying true to recreating the real sign, the colors you will need are red, yellow, blue and white.
Enhance the vibrancy of your sign by lighting it up in true Las Vegas fashion. Use string lights like the type commonly used for Christmas decorations as a border around the outside of the sign. The actual sign is lit up with bright neon lights, like the rest of Las Vegas, so this extra element will help give your replica an authentic feel.
Related Articles
How to Make Your Own Tabletop Sign ...

Ideas for Black and White Party ...

Celebrity Themed Party Ideas

Ideas for Patriotic Day Dress
How to Make a Volcano for Kids

How to Create Your Own Anime Character

How to Hide the Walls at a Wedding With ...

How to Make a Tutu Stick Out
Ideas for a Vegas Theme Party
Welcome Home Decorating Ideas
How to Print Wedding Enclosure Cards

How to Create a Family Shield

How to Accessorize When Wearing Black & ...

Cheerleading Theme Ideas

Dresses That Flatter an Hourglass Figure

Ideas for Diamond Party Decorations
How to Make a Pirate Cannon for a Party

How to Wear a Pantsuit to a Formal Event

How to Make Animal Print With ...

How to Make Your Own Funeral Flower ...
References
Writer Bio
A West Coast transplant currently living in Washington D.C., Rhiana Quick has always had a passion for writing and started her freelance career in 2010. Quick earned her bachelor's degree in political science and French from Boise State University and is currently working at a nonprofit organization.
Photo Credits
las vegas image by charles taylor from Fotolia.com