
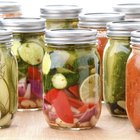
Half-pint jars are the go-to choice for jams, jellies, condiments and gift giving. Try your hand at boiling water-bath canning and create some delicious items that you can treasure all year long. Suitable for high-acid foods like most fruit products, fermented foods and acidified pickled foods, water-bath canning is straight-forward and requires little more than the standard cooking equipment found in most homes. Step into the world of canning using half-pint jars and put up some homemade goodness from your own kitchen with love.
Prepare the Jars
Step 1
Fill your water bath with tap water and place it on the burner set to high. Jars must be covered by at least 1 inch of water for processing; with half pints you are able to use less water to cover the jars, so in most cases you don't have to fill your canner all the way up. Insert the canning rack and place all the cleaned half-pint jars you will be using for your recipe on the canning rack to sterilize. Bring to a boil and hold the jars at a simmer until your recipe is ready.
Step 2
Prepare the jar's contents according to the directions from a reliable canning recipe. When the recipe is complete and the jars are simmering, remove them from the boiling water bath with tongs and set them on a cutting board on the counter.
Step 3
Place the lids in a bowl and ladle the simmering water from the boiling water bath over them to cover them. Set the rings next to the lids for easy access.
Fill the Jars
Step 1
Place the jar funnel atop of the first jar and use the ladle to fill it. Follow recipe directions regarding how much headspace to leave, as this varies by recipe.
Step 2
Push the air remover or a clean butter knife down around the sides of the jar to remove any pockets of air. If you are making jelly, jam or another item that is a liquid at this stage, this step is not necessary. Fill all the half-pint jars and remove air pockets.
Step 3
Wipe the rims of all the jars using the clean kitchen washcloth. Use the jar lifter to remove a lid from the scalding water and place it on the first jar. Place the ring on the jar and tighten just until you feel some tension. Avoid over-tightening jars, as air will need to escape to form a good seal.
Step 4
Place the jars on the canning rack with tongs. Cover the canner, turn the heat to high and bring the water back to boiling. Start the timer when the water is boiling and process according to recipe directions.
Step 5
Turn off the heat when the timer goes off and take off the lid of the boiling water bath. Set the timer for 5 more minutes and let the jars sit in the water until it goes off. Remove the jars after this time and place them on a cutting board or kitchen towel.
Step 6
Check to ensure that your jars are sealed once they are cooled. Remove the rings and apply pressure to the lids with your thumb and middle finger, attempting to remove the lid. If any jars do not seal, refrigerator them.
Related Articles

How to Preserve Sauerkraut

How to Vacuum Seal Jars
Why Do Canning Jars Pop While Cooling?
How to Heat Process Mason Jars to Seal
How to Can Venison Meat
How to Put Together a Cuisinart Blender
How to Can Green Tomatoes & Peppers ...

How to Process & Seal Hot Sauce Bottles
Instructions for Canning With a ...
How to Use Citric Acid in Canning
How to Preserve Pimentos
How to Dry Pack Long-Term Food in Mason ...
How to Change My Last Name for Free
How to Preserve Nectarines

How to Make Cloth Covers for Canning ...

Owner's Instructions for a NuWave ...
How to Make Espresso Using a Krups Il ...
How to Clean a Contact Lens With ...

Nordic Ware Ice Creamer Instructions
How to Preserve Blackberry Juice in ...
References
- Food in Jars; Marisa McClellan
- Canning for a New Generation; Liana Kristoff
- The Joy of Jams, Jellies and Other Sweet Preserves; Linda Ziedrich
Tips
- If you do not have a proper canning rack and water bath canner, use a large pot with some kind of rack inserted to prevent the jars from touching the base of the pot. A cake rack or cooling rack is a good choice; in a pinch a towel at the bottom of a large pot also works.
Warnings
- Do not place hot jars directly on your kitchen counter, as this change in temperature can cause the jars to break.
- Store your jars in a cool, dry and dark location for optimal shelf life.
Writer Bio
Based in Portland, Ore., Maxine Wallace is a writer with more than 12 years of experience. With a bachelor's degree in journalism and experience working on marketing campaigns for large media agencies, she is well-versed in multiple industries including the Internet, cooking, gardening, health, fitness, travel and holistic living.
Photo Credits
Jupiterimages/Stockbyte/Getty Images