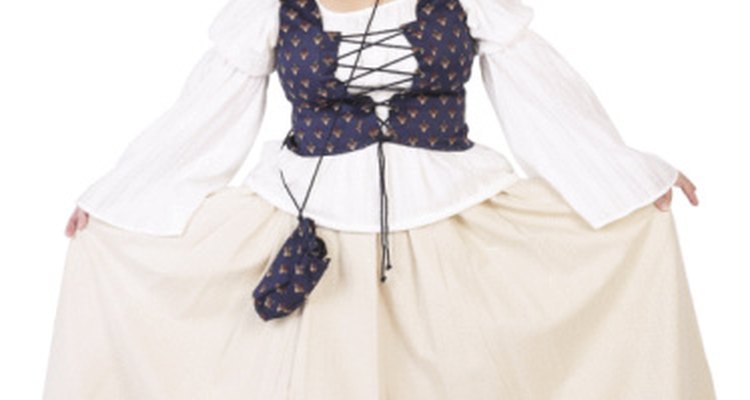
Although the corset was at one time considered an essential part of every woman's wardrobe, it has lost much of its popularity as a functional undergarment. But it has never gone completely put of style. Pop culture figures such as Madonna revived the fashion by wearing the corset as a trendy, avant garde piece of outerwear intended to be visible to the public eye. With a few basic sewing skills, it is possible to make your own simple lace-up corset.
Making the Pattern
Take a tight-fitting sleeveless tank top made from non-stretchable fabric and put it on. Examine the length of the top to determine if this is the desired finished length for your corset. If a shorter corset is desired, use a tape measure to determine how many inches shorter it will be. Record this measurement.
Examine the neckline of the top and decide if your corset neckline will be lower. Use the tape measure to determine how many inches lower, if necessary. Record this measurement. Remove the top.
Turn the top inside out. Fold it in half lengthwise with the front folded inside. Lay the top on a large sheet of paper, placing the folded middle edge of the top along the straight edge of the paper. Pin in place.
Trace around the outer edge of the garment. If the tank top is the desired length for the finished corset, allow an extra inch for the hem. If the seam allowances on the tank top are less than 1/2 inch, allow a little extra to provide for a 1/2-inch seam allowance on the corset. Add an extra 1/2 inch around each armhole and neckline to finish the edge. Cut around the outer edge. Remove pins. Label the pattern piece "Back Section."
Repeat Steps 3 and 4, but label the second pattern piece "Front Sections." Use a pencil to draw a line an inch or two up from the bottom edge of the pattern, if shortening the pattern is necessary. Use the measurements taken in Step 1 and add a 1-inch allowance for the bottom hem. Cut the pattern to match the new measurements, if necessary.
Use the pencil to draw a deeper "U"-shaped semi-circle on the pattern pieces, slightly below the cut curved edge of the neckline. If an adjustment to the neckline is desired, use the measurements taken in Step 2. Cut the pattern to match the new measurements, if necessary.
Making the Corset
Prepare the fabric by folding it in half lengthwise, aligning the selvages and keeping the right sides folded inward. Lay the long straight edge for the back section pattern piece along the fold of the fabric. Pin in place. Cut around the outer edge of the pattern.
Lay the front section on the folded fabric and pin in place. Do not place this section on the fold. Cut around this pattern piece, producing two separate pieces for the front of the corset.
Use a zigzag stitch and over-sew. Fold over 1/2 inch toward the wrong side of the front sections along this center edge; pin and press in place. Use a straight stitch to sew in place, stitching as close to the raw edge as possible.
Place one of the front sections on top of the back section with right sides facing each other inside, aligning the top shoulder seam and side seam from the underarm to the bottom edge. Pin in place. Stitch the top shoulder seam and side seam, allowing 1/2-inch width for the seam. Repeat with the other front section.
Finish the raw edges around the armholes and neckline in a similar manner to the process in Step 3, by first zigzag stitching over the edge, and then turning, pinning, pressing and sewing the turned edge in place. Zigzag the hem in the same manner, but turn up 1 inch before pinning, pressing and sewing in place.
Open the corset and lay one of the front sections as flat as possible. Measure the distance from neckline to bottom edge and calculate the number of eyelet grommets needed, starting with one close to the neck edge, one close to the bottom edge and the rest spaced evenly about 1 inch apart. Place the straight edge of a ruler next to the front edge of the corset and place the eyelets into position, ensuring they are in a straight line. The outer edge of the eyelets should be about 1/4 inch from the center edge of the corset.
Insert the tip of the fabric pencil in the center of each eyelet, marking the spot. Remove the eyelets. Make a small hole in the fabric at the mark, using the pointed end of a seam ripper. Insert an eyelet grommet into the hole, with the top of the grommet on the right side of the fabric. Follow the instructions that come with the eyelet kit, or turn the fabric over to the wrong side and insert the fastening tool over the back end of the grommet. Gently hammer into place. Continue this process of making holes and fastening the grommets for all the marked holes. Repeat Steps 6 and 7 for the other front section.
Put on the corset. Thread a length of ribbon through the eyelets on both sides of the front of the corset, adjusting the tightness of the corset as you do so. Cross the ribbon, forming an "X" in between each pair of eyelets in the same way shoes are laced. At the bottom edge of the corset, allow long enough ends on the ribbon on both sides of the bottom edge to tie a bow, and then cut the ribbon to the desired length.
Related Articles

How to Make Your Own Full Slip

How to Give a Sweatshirt an ...

How to Make a Satchel

How to Make a Bottom-Tie Tank Top

How to Narrow Wide Pants

How to Make a Corset Bridal Gown Larger

How to Add Elastic to the Ends of Pants ...

How to Make a Toga Costume for a Kids' ...

How to Make a Dew Rag

Turning a Shirt Into a Tank Top for Men

How to Make a Clerical Shirt

Making a Cummerbund

How to Repair a Ripped Back Pocket on ...

How to Hem a Sequin Dress

How to Make an Alteration to a Lined ...

How to Make a Men's Waistcoat

How to Put a Wedge of Fabric in the Leg ...

How to Install a Zipper on the Side of ...

How to Make an Ascot

How to Cut the Neckline of a Hoodie
References
Writer Bio
Freddie Silver started writing newsletters for the Toronto District School Board in 1997. Her areas of expertise include staff management and professional development. She holds a master's degree in psychology from the University of Toronto and is currently pursuing her PhD at the Ontario Institute for Studies in Education, focusing on emotions and professional relationships.
Photo Credits
Hemera Technologies/PhotoObjects.net/Getty Images