Modifying your wardrobe from winter layers to spring and summer styles generally includes lightweight garments. Although skin-revealing dresses and tops keep you cool on hot days, it is also important to wear garments with a proper fit. Shoulder strap dresses often pose fit issues given that strap lengths differ. Long length straps continuously fall off the shoulders during natural movement, creating more stress than relaxation. Since shoulder straps and dress styles differ, alteration methods vary. Create new seams along the shoulder to keep the original dress silhouette intact.
Creating the New Shoulder Seam
Step 1
Turn the garment inside out, and place it on your dress form.
Step 2
Pinch the excess fabric along the shoulder seam and pin with dress pins. For instance, if your dress straps have excess fabric at the back view, the shoulder seam most likely will shift, creating the new shoulder seam for the shortened strap. Repeat this step with the remaining strap.
Step 3
Pin the excess fabric of the dress with dress pins making sure both shoulders appear even. Remove the garment from your dress form.
Step 4
Mark the excess fabric with tailor's chalk, and remove the dress pins on both sides of the shoulder straps. These markings are the stitch lines for the new shoulder seams. If the markings are not defined, use a clear graph ruler, and draw the shoulder seam lines with a disappearing ink fabric pen.
Step 5
Open the shoulder seams with a seam ripper. If the yoke is lined or double-faced -- top shell with inner layer of fabric -- you will most likely have to open the side and waist seams if the yoke of the dress is stitched closed. The same applies if the dress has binding around the neckline and armhole. The cloth will have visible punctured stitching lines once the thread is removed. Though this step is time consuming, it facilitates the alternation and stitching process.
Step 6
Place the open dress on your worktable. Measure a ¼ inch from the original marking made in step 4 with a clear graph ruler for seam allowance. Mark the line with tailor's chalk or the disappearing ink fabric pen.
Step 7
Repeat steps 4, 5 and 6 if your dress has lining. Skip this step for single layer dresses.
Shortening the Straps
Step 1
Pin the stitch line made in section 1, step 4. Make sure both straps are pinned equally. For instance, if you need to remove 2 inches from the right strap, you need to remove 2 inches from the left. This ensures that both straps sit evenly across your shoulders for a comfortable fit.
Step 2
Baste -- long stitches meant to hold fabric layers together temporarily -- the new shoulder seams with a hand-sewing needle and thread. Although this step is optional, it allows you to try on the dress and make sure you are satisfied with the new strap length prior to cutting away the excess or stitching the straps in place.
Step 3
Cut away the excess fabric with fabric scissors along the line made in section 1, step 6.
Step 4
Adjust the stitch length on your machine to match the visible stitch lines on the dress. This is especially important if the straps have top, double-needle or decorative stitches. Though optional, stitch a few rows on a piece of fabric scrap to ensure you have selected a matching stitch length.
Step 5
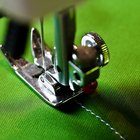
Thread your sewing machine with matching thread. Position the shoulder straps and lower the foot, gently pulling the basting stitches made in step 2 of this section.
Step 6
Machine stitch along the new seam stitch line made in section 1, step 4. Repeat this step with the remaining shoulder strap.
Step 7
Open the new shoulder seam and press with your iron. If you are working with delicate fabric, cover the seam with a protective sheet. Pressing the seams open removes excess bulk at the shoulder seams, especially if you are working with a lined dress or double-faced yoke.
Step 8
Cut away loose threads, and re-pin the yoke along the original side and waist seams, according to your dress silhouette.
Step 9
Repeat this section, steps 1 through 8 if your dress has a lining or double-faced straps. The inner layer needs to match the outer shell for the new shoulder seams to lie flat across the shoulders and for the straps to fit correctly.
Step 10
Stitch the dress along the punctured stitching lines from section 1, step 5 to re- construct the dress to its original silhouette with the shortened straps.
Related Articles

How to Make an Alteration to a Lined ...

How to Hem a Sequin Dress

What Is the Purpose of a Slip Under a ...

How to Take up the Shoulder Seams in a ...

How to Make Chinese Dresses

How to Remove the Lining on a Peg ...

How to Fix a Wedding Dress That Is Too ...

How to Wear a Cheongsam

How to Hem a Sequin Dress

How to Make a Carpet Bag Purse

Sheath vs. Shift Dresses

Wrap Dresses Instructions

Steaming a Chiffon Wedding Dress

How to Hem a Formal Dress

How to Make Foundation Undergarments

How to Fold a Dress Without Wrinkling

How to Prevent Rashes From Sequined ...

How to Make a Jingle Dress

What Do Chinese Women Wear?

The Best Dresses for Minimizing Your ...
References
Resources
Writer Bio
Mercedes Valladares is the founder of M721Organics and has been an independent designer for over 15 years. Her work experience commenced during college with manufacturers based in New York and Hong Kong. Her education includes LIM College, International Fine Arts College and design certification from the Paris Fashion Institute. She produces eco-crafting videos and writes recycling articles online.
Photo Credits
David De Lossy/Photodisc/Getty Images