
Jupiterimages/Brand X Pictures/Getty Images
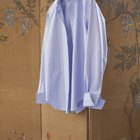
Whether storing guest coats on a special occasion or for out-of-season or excess clothing, garment racks are "must-haves" for neatly storing away hanging garments when closet space is scarce. Garment racks have come a long way from the heavier models that woodworkers once made. Now sold in stores in easy-to-assemble kits, all you need to complete your garment rack are the parts, an extra set of hands and the assembly instructions for a garment rack.
Start with the Base
Attach the two wheels to the two ends of the garment rack's base if they were not preinstalled. Insert each caster's locking stem end into its slot and snap into place, or screw each wheel to the base of the garment rack.
Screw each wheeled end of the garment rack to the horizontal base pole or shelf of the garment rack using a hex-key, Phillips drill bit or a set of wrenches, depending upon what type of screws or bolts are required. Some garment racks have a shelf at the base to serve as shoe or bag storage in place of a simple stabilizing bar.
The Side Bars and Top Railing
Insert the side vertical poles into the base support at each end and screw into place. Have someone hold the piece as you tighten the screws or bolts. After attaching the other side's vertical poles to the base, line up one end of the top crossbar or shelf to the top of one of the vertical parts. Have another person hold up the other end to keep this part vertical as you attach the parts together.
Insert the screw or bolt through the holes located at the top of the side vertical poles and into the end of the top crossbar or shelf and tighten. Line up the other end of the crossbar or shelf to the other side vertical pole, insert the screws or bolts and tighten.
Instead of screws or bolts, some garment racks have plastic L-shaped caps fitted at the top ends of the side vertical poles. One end of the cap snugly fits over the top vertical side bar and the other end fits over the crossbar or garment pole. While this method makes it easy to snap the pieces together, one disadvantage is that over time–and with the weight of the hanging clothes–the pole tends to slip out of the plastic cap, especially when rolling the unit. Look for units that use screws or bolts to avoid the garment rack falling apart when in use.
Related Articles
How to Put in a Separating Zipper

The Best Way to Pack a Silk Dress
How to Remove a Metal Snap Fastener ...
How to Stop Hanger Marks

How to Use a Clothes Hanger

How to Whiten Chiffon
Functions of the Parts of a Steam Flat ...

How Do I Hang a Wreath on a Tombstone?
How to Fold a Graco Stroller
How to Put a Zipper on a Jacket

How to Hang Sweaters So They Don't Get ...

How to Put Rank on an ACU Cap

How to Remove Wrinkles From Polyester ...
How to Replace a Missing Button

What Is Draping in Fashion?
How to Fix a Wallet Snap

How to Properly Hang Dress Pants

Proper Care & Washing of Nylon Panties
How to Make a Carpet Bag Purse
How to Repair Andersen Windows
References
Writer Bio
Naima Manal's articles on health, diet, nutrition, alternative medicine, education, parenting, crafts, travel, home and garden and home improvement have appeared on various websites. Manal received her Bachelor of Science in biology/pre-medical studies from Molloy College in 1994 and has been a freelance writer, teacher and homeschooling mom since 1993.
Photo Credits
Jupiterimages/Brand X Pictures/Getty Images