
Jupiterimages/Photos.com/Getty Images
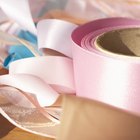
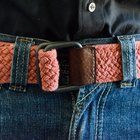
Slide buckles are easy to use to make all sorts of things, from belts and headbands to straps to secure a bag. Slide buckles come in different shapes, sizes and materials, but consist of a simple shape divided into two sections by a central separator bar. The buckle will show on your finished project, so choose one that works the fabrics, trims or ribbons you are using, which can range from rhinestones and sparkle to utilitarian plastic or stainless steel.
Measure the center bar of your slide buckle to determine the necessary finished width of your ribbon or webbing.
Reinforce the material as necessary before installing a slide buckle. Cut fabric two times the width of your slide buckle, plus 1 inch. Interface fabric with fusible interfacing and sew with the printed sides of the fabric facing one another and a 1/2-inch seam allowance. Seam three sides, leaving one short end open. Turn right side out and press well.
Double face ribbon if you are opting for ribbon instead of fabric by fusing the wrong side of one piece of ribbon to the wrong side of another according to the fusible adhesive manufacturer's instructions. Sew 1/8 inch from the edge of the ribbon along each long side.
Hem one end of your ribbon or webbing before attaching the slide buckle. Choose a hem treatment that works well for the ribbon or webbing; however, if you are applying a slide buckle to fabric, it will have been hemmed in the prior step.
Fold the raw end of your ribbon, webbing or fabric under 1/2 inch. Press, then thread through the slide buckle. Pass the fabric up through the buckle, over the center bar, then back down. Pull the end approximately 2 inches past the center bar of your slide buckle.
Sew across the folded end of the ribbon or webbing by machine to attach the slide buckle.
Thread the hemmed end of the ribbon up through the buckle, then down over the bar and through the other side of the slide buckle. Pull snug as needed.
Related Articles
How to Attach Adjustable Buckles
How to Make Chinese Dresses

How to Hem a Sequin Dress
How to Make a Bridal Cape for a Wedding ...
How to Make a Fabric Bow

How to Attach Ribbons to a Navy Uniform

How to Make a Pull-String Bracelet

How to Fix a Hook on Pants
How to Stop Satin from Fraying

How to Make a Can-Can Costume

How to Sew Tube Dresses

How to Sew Your Own Tubular Bandana

How to Make a Prairie Skirt
Making a Cummerbund
How to Fasten Double D-Ring Belt Buckles

How to Fold a Dress Shirt to Avoid ...
How to Keep the Elastic in a Waistband ...
How to Tie a Western-Style Bandana

How to Cut Up a Shirt for the Gym

How to Tuck & Tape
References
Writer Bio
With a master's degree in art history from the University of Missouri-Columbia, Michelle Powell-Smith has been writing professionally for more than a decade. An avid knitter and mother of four, she has written extensively on a wide variety of subjects, including education, test preparation, parenting, crafts and fashion.
Photo Credits
Jupiterimages/Photos.com/Getty Images