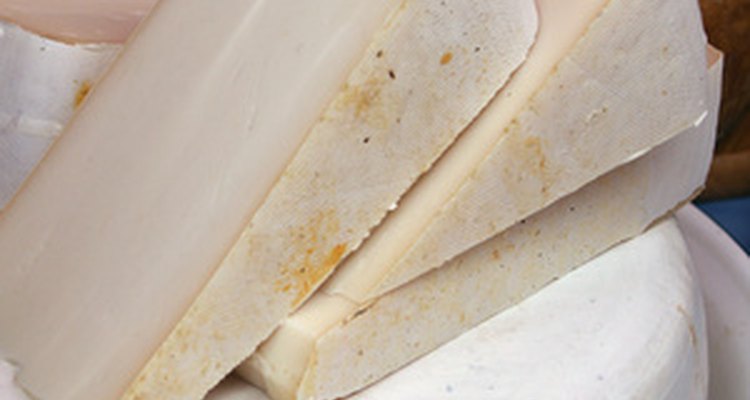
Many soft cheeses can be made without the use of special equipment, but to make hard cheeses such as Swiss and cheddar, you'll need a cheese press. A press forces the cheese curd into a specially designed mold and helps excess liquid to drain. The Dutch--or lever--design is one of the most efficient types of press because it uses what's called "mechanical advantage" to provide up to 100 lbs. of pressure without requiring 100 lbs. of physical weight. You can make your own medium-sized tabletop press, which can easily be modified for larger applications.
Build the Base
Saw the 1-by-4 boards into two 3-foot lengths and label them B1 and B2. Cut three 1-1/2-foot lengths and label them B3, B4 and B5.
Place the lengths on their sides and arrange B1, B2, B3 and B4 into a rectangle, with B3 and B4 on the inside of B1 and B2 like rungs of a ladder. Place B5 between B3 and B4, forming a third rung at the center of the rectangle.
Drill two 1/8th-inch pilot holes through B1 and B2, going into B3, B4 and B5 at each point of intersection, and fasten using #6 drywall screws. This will form a solid base.
Place your 19-1/4-inch piece of plywood or hardwood board on top of the base. It should cover the right half of the frame from edge to edge. Once the board is in place, drill four pilot holes through the board at each corner and connect the pieces with drywall screws.
Build the Tower
Cut the remaining 1-by-4 boards into two 1-1/2-foot pieces labeled T1 and T2, one 3-foot piece labeled T3, and one 2-1/2-foot piece labeled T4.
Fashion a slot in the center of T1 and T2 large enough for the vertical press beam to fit through. Using a tape measure or T-square, find the center of both boards. Take your 3/4-inch spade bit and bore a hole through the center point, then to the left and right of it. The three holes should be far enough apart so they do not overlap, but close enough so there will be only a thin layer of wood between them. Using a wood file or rasp, remove the wood separating the holes and clean up the edges, creating a slot approximately 2-1/2 inches long by 3/4 of an inch wide. Repeat this process for the second piece.
Make a slot in the top of T3 to act as the pivot point for the lever arm. Find the center point on the face of the board and mark a point about half an inch to the left of the center. Draw a 4-inch line down from this point and another 3/4 of an inch to the left. Using your 3/4-inch spade bit, drill a hole between these lines 4 inches down from the top. Saw along the lines from the top of the board to the edges of the hole, creating a 3/4-inch wide slot.
Turn T3 on its side and mark a point 2 inches down from the top. Drill straight through this point, all the way through the slot you just cut and out the other side of the board.
Place the T3 and T4 pieces on their sides, parallel to one another, so that the bottoms are perfectly flush. Place T1 between the two pieces near the top of T4. Drill two 1/16-inch pilot holes going through T3 and T4 and into both ends of T1 and affix the pieces with #6 drywall screws.
Put T2 between T3 and T4, about 8 inches down from T1. Make sure the slots are lined up. Drill 1/6-inch pilot holes through T3 and T4 into both ends of T1 and affix with #6 drywall screws.
Build the Press Beam and Lever Arm
Cut a 3-foot section of 1-by-3-inch board. Draw a vertical line down the center of the board and mark with a dot every 2 inches along the line, starting 5 inches in from the top. Fit your 1/4-inch drill bit into your electric drill and bore a hole straight through the board at each of the 14 dots.
Form the bottom of the press beam by cutting a square of 1-by-4 board and marking the center point. Place this square on one end of the press beam (making a "T" shape). Drill a 1/16-inch pilot hole through the square and into the press beam, and secure it in place with a #6 drywall screw.
Build the lever arm by cutting a 4-foot section of the 1-by-3-inch board. Draw a line down the center of one of the flat sides. Mark a point along this line at 2 inches and another at 9 inches from the end. Drill a 1/4-inch hole through both points; the first will act as the pivot point, the second will connect the lever arm to the press beam.
Assemble the Press
Slide the end of the press beam through the slots in the T1 and T2 tower pieces and turn the tower on its side. The press beam should be able to move freely up and down through the slots in the center.
Place the tower over the base so that T3 and T4 straddle the plywood board and the bottom of the press beam is in the center of the board when slid all the way down. Make sure the tower is centered and that the bottoms of the T3 and T4 pieces are flush with the B3 and B4 pieces. Drill two 1/16-inch pilot holes through T3 and T4 and into B3 and B4 and secure in place with #6 drywall screws.
Slide the end of the lever arm into the slot at the top of T3 and line up the holes that you drilled for the pivot point. Attach these pieces together with a 5-inch-long 1/4-inch bolt and secure it with a fender washer and 1/4-inch hex bolt. Tighten the hex nut only enough so that the bolt will not slide out of the hole. The lever arm must be free to move.
Choose a 1/4-inch hole on the press beam that corresponds to the height of the cheese mold you are using and line it up with the hole in the lever arm. Slide the 3-inch-long 1/4-inch bolt through the two holes and secure with a fender washer and wing nut. Do not tighten all the way.
Mark specific points on the lever arm from which to hang the 10 lb. weight so that you can accommodate the different amounts of pressure required by different recipes. For instance, at a distance of 18 inches from the press beam, the press will exert 20 lbs. of force. Mark a point every 4-1/2 inches and drill a 1/4-inch hole through the lever arm. Each increment will represent an increase (or decrease) of 5 lbs. of pressure. Most cheeses won't require more than 50 lbs. of pressure, however, so you should only need to drill nine holes.
Related Articles
How to Make a Flour Mill Machine
How to Make a Wood Wedding Arch

How to Sew a Dart Into Jeans

How to Measure Feet Using a Brannock ...

DIY Himmeli-Style Christmas Star Tree ...

How to Measure Coffee Grounds When ...
Homemade Hole Puncher

How to Remove Watch Band Links From an ...

How to Build a Hop Harvesting Machine

How to Create Your Own Heelys

How to Order Cooper Sharp Cheese
How to Make Cowboy Spurs

How to Disassemble Remington Shavers

How to Replace a Vending Machine Lock

How to Cook Cheesecake in a Cupcake Pan

5 Easy Steps to Prep Cardboard for ...

How to Build a Bamboo Wedding Arbor
How to Make a Drink Holder for Crutches

Calories in a Subway Sandwich

How to Make a Rhinestone Template
References
Writer Bio
Randal Singultary is a freelance writer, fiction author and poet, living and working in the Boston area. He graduated cum laude from Wheaton College with a B.A. in English in 2009.
Photo Credits
cheese image by AGITA LEIMANE from Fotolia.com