Siri Stafford/Digital Vision/Getty Images
The polo shirt was once an iconic garment for polo players on the field. The fashion world re-imagined this shirt and introduced such concepts as the button-down collar and the embroidered image of a polo player to the world of preppy clothing. Today, these shirts are iconic for sports such as golf and tennis and many times suitable for a day at the office. While these cotton shirts are durable, the fine weave of the cotton fabric can get snagged on any number of surfaces and can turn into large holes if they aren't repaired quickly.
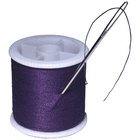
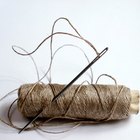
Cut off a 6-inch piece of thread with a pair of scissors, and push the end through the eye of an embroidery needle. Feed the thread through the eye until there are two even ends. Gather the two ends into a tidy tail.
Place the tip of the threaded needle at the base of the snag on the outside of the shirt. The goal is to find the base of the snag, where the thread has been pulled from.
Push the tip of the needle gently into the base of the snag. Push through until the eye of the needle is next to the base of the snag. Wrap the string of the snagged material around the thread on the needle a couple of times to get the snag secured.
Pull the needle all the way through to the wrong side of the shirt. Flip the shirt over so that you are now looking at the back side of the snagged area where the needle just emerged. Pull on the needle gently as you pull the snagged thread through.
Pull the needle and thread free of the snagged material once you have the snag securely pulled through to the wrong side of the shirt. Gently pull on the snagged thread to ensure the fiber is completely through. Check on the right side of the shirt to see that the snag has been smoothed.
Tie a double knot with the snagged thread on the inside of the shirt to secure the fiber and keep it from coming loose again. Skip this step if the snag is too small. Do not cut this thread or you will end up with a hole in your shirt.
Repeat this process with larger snags and multiple pulled threads until the front surface of the snag has been smoothed.
Related Articles

How to Get Rid of Snags on a Silk ...

How to Wash Collar Stains on a Leather ...

How to Fix Holes in Cotton Shirts

The Correct Way to Adjust the Belt on a ...

How to Sew Elbow Patches on a Knit ...

How to Stretch Cotton Shirts

How to Tie a Zipper Tie

How to Unwrinkle Velvet

How to Replace Shirt Buttons With Cuff ...

How to Remove Permanent Marker From ...

How to Fix a Rip in the Armpit of a ...

How to Get a Snag Out of Polyester ...

How to Invisibly Mend Moth Damage in a ...

How to Tie a Man's Tie in the European ...

How to Tie a Clip-on Tie Knot

How to Determine the Length of a Bow ...

How to Fix a Hook on Pants

How to Remove a Crease in a Silk Scarf

How to Starch Collars

How to Spot Fake Ralph Lauren Clothes
References
Writer Bio
Sarah Vrba has been a writer and editor since 2006. She has contributed to "Seed," "AND Magazine," Care2 Causes and "202 Magazine," among other outlets, focusing on fashion, pop culture, style and identity. Vrba holds an M.A. in history with an emphasis on gender and fashion in the 19th century.
Photo Credits
Siri Stafford/Digital Vision/Getty Images