
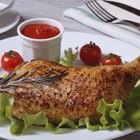
While duck legs have a naturally rich taste, brining them adds even more flavor and juiciness to them. The traditional wet brining consists of soaking the duck legs in liquid heavily saturated with salt. However, it can prevent the skin from crisping up well, which is why certain recipes call for a dry brine -- placing the salt and seasonings directly on the duck. Choose a brining method based on how you plan to prepare the duck legs. Wet brining works well for slow-braised legs, while roasted duck legs, as well as duck confit, benefit most from a dry brine.
Dry Brine
Step 1
Rinse the duck legs under cold water and pay dry with paper towels. Place the legs on a clean cutting board.
Step 2
Combine kosher salt with herbs and spices for the salt rub. Salt is the basis for dry brining. For every 1 pound of duck legs, use 2 tablespoons of salt. Add a pinch or so of freshly chopped herbs and other spices, as you see fit. Additional herbs and spices often used for duck legs include such as thyme, parsley, bay leaves, black pepper and garlic powder
Step 3
Rub the salt mixture all over the duck legs, covering both sides of each leg generously, as well as under the skin. Place the salted legs on a baking tray in a single layer and cover loosely with plastic wrap. Store it in the refrigerator for 24 to 48 hours, turning them over halfway through.
The Wet Brine
Step 1
Fill a large container with water. Add 2 tablespoons of kosher salt for every 4 cups of water. Mix the salt into the water to help it dissolve. You can also reduce the amount of water and add another flavoring liquid, such as orange juice or a vegetable broth.
Step 2
Add additional seasonings to the brine, as you see fit, such as black pepper, smashed garlic cloves, grated ginger and freshly chopped herbs.
Step 3
Submerge the duck legs into the brine and cover with the lid. Store in the refrigerator for 24 to 48 hours.
Related Articles

How Do I Cook Duck Legs in a Dutch Oven?

How to Exfoliate Legs for Shaving

How to Marinate BBQ Chicken Thighs & ...

Can the Neck Be Exfoliated?

How to Shave Legs With an Electric ...

How to Mix Mineral Salt & Preparation H ...

How to Get Rid of Blemishes on Your Legs

How to Make a Dead Sea Salt Face ...

How to Get Leg Wax Off Skin
How to Soak New Boots in Water

How to Clean Scuffed Up Rain Boots
How to Cook Boneless & Skinless Chicken ...
How to Barbecue Turkey Legs in Foil

How to Gargle With Sea Salt

How to Soak Your Feet in Mouthwash

Are There Ways to Get Rid of Blocked ...

How to Get Dark Ankles Lighter

How to Use Sea Salt for Cracked Heels ...

How to Whiten Jeans

How to Cook Turkey With Apple Juice
References
- The Essential Thomas Keller; Thomas Keller
- Cooking for Geeks; Jeff Potter
- Feast St. Louis: The Cheat: Duck Confit
- A Platter of Figs and Other Recipes; David Tanis
Tips
- Some recipes for duck legs call for them to be trimmed of excess fat before brining, although it depends on how you are preparing the duck.
Writer Bio
Based in Los Angeles, Zora Hughes has been writing travel, parenting, cooking and relationship articles since 2010. Her work includes writing city profiles for Groupon. She also writes screenplays and won the S. Randolph Playwriting Award in 2004. She holds a Bachelor of Arts in television writing/producing and a Master of Arts Management in entertainment media management, both from Columbia College.
Photo Credits
Jupiterimages/Photos.com/Getty Images