
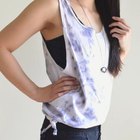
Tie-dyeing doesn't mean that you have to drag out bulging buckets, fill them with sloshing color baths and dip and drip your way to a creative craft. Although the color bath and dip method is one tie-dye option, you can also create perky patterns and pretty prints using a simple spray bottle. Whether you're a novice or a seasoned pro, making a spray-on, tie-dye t-shirt, scarf, tote bag, wall hanging or any other fabric-based design is an easily adaptable project that almost any crafter can do.
Step 1
Pick an workspace that you can get messy and that is easy to clean -- keeping in mind that the spray can easily splatter. Go with an outdoor area such as the backyard or select a utility-type of room if you have to work indoors.
Step 2
Prep your work space by placing plastic sheeting or tarp over the surfaces and you'll avoid the mess that a spray bottle filled with boldly-hued dye can create.
Step 3
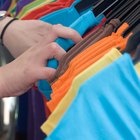
Pre-wash and thoroughly dry whatever piece of fabric you are going to tie-dye.
Step 4
Remove the top and its sprayer attachment from your spray bottle. Mix the dye directly in the bottle by following the manufacturer's directions for the amounts of dye and hot tap water. Replace the sprayer attachment, tighten the cap and shake the dye to mix it together thoroughly. Test the color mixture by squirting it onto a small piece of white scrap fabric. Repeat the mixture process for different colors of dye, making one per spray bottle.
Step 5
Create a traditional tie-dye swirl in your chosen piece of fabric by pinching the center of your fabric and twisting the material into a circular spiral and then securing that portion of the material with a rubber band. Design circular or dot-like patterns by pulling pieces of the fabric up and tying them off with a rubber band, ponytail style. Use folding or the rubber bands in any other way that you want to make creative prints, or wait and use the dye directly by itself to make a pattern.
Step 6
Place your fabric onto the plastic sheeting or tarp barrier. Put on rubber gloves to protect your skin. Spray the fabric with the first -- or only, if you are choosing to use one single color -- bottle of dye. Continue spraying until you cover the entire designated area. Switch color bottles for a multi-hued pattern. Turn the material over, and repeat the spray process for the other side.
Step 7
Place your tie-dye craft into a plastic zipper bag and let it sit overnight.
Step 8
Remove any rubber bands that are on your tie-dye project. Unfold or unroll the fabric, lay the it flat on the plastic barrier and allow it to dry.
Step 9
Rinse the shirt or fabric with cool water until the water runs clear of any color.
Step 10
Wash the tie-dyed material in the washing machine, using a mild detergent. Dry the shirt on a line or in a clothes dryer.
Related Articles

How to Waterproof a Leather Jacket

How to Bleach a Black Shirt Gray

Tie-Dye Techniques With Bleach

How to Dye Pantyhose
How to Make a Bottom-Tie Tank Top

How to Spray Dye a Synthetic Wig

How to Make a Helghast Costume

How to Get Tie-Dye Colors to Stay Bright

How to Redye a Shoe

How to Bleach Out the Original Color of ...
How to Remove Silk Screening From ...

How to Dye Faded Black Dress Pants
How to Dye Clothes Black With a Sharpie

How to Glue Rhinestones on Jeans
How to Make a Dew Rag

How to Hem a Sequin Dress
How to Tie-Dye Dresses
How to Stop Satin from Fraying

How to Dye Leather Shoes From Brown to ...

How to Tie Dye Shoelaces
References
Tips
- If you don't want to fold or use rubber bands, simply spray different colors in a random pattern on the material to make an abstract print.
- Keep in mind that the sprayed-on colors may run and bleed together. You can use this to your advantage, making an extra palette of hues from two primaries. For example, you can make green in the places where your yellow and blue sprays mix.
Warnings
- Protect your eyes from the spray. Wear glasses, goggles or other protective eye wear.
- Don't overfill the spray bottles. This may stop the dye solution from coming out easily.
- Avoid spraying the area around your project.
Writer Bio
Based in Pittsburgh, Erica Loop has been writing education, child development and parenting articles since 2009. Her articles have appeared in "Pittsburgh Parent Magazine" and the website PBS Parents. She has a Master of Science in applied developmental psychology from the University of Pittsburgh's School of Education.
Photo Credits
Jupiterimages/Photos.com/Getty Images