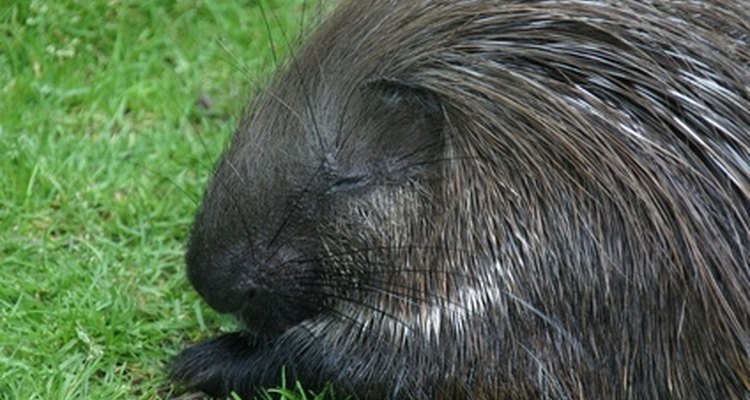
Have you ever wondered if porcupine quills would make good jewelry? The lovely natural colors and smooth texture inspire jewelry designs, but you are a little leery of the sharp ends. Porcupine quills have been incorporated in jewelry for centuries. The material is delicate, so care must be taken when handling porcupine quills.
Select from several different sizes of quills. The smallest ones can be used in jewelry designs on cloth, such as cloth barrettes or shirt designs. Medium and large quills make great necklaces, bracelets, pendants and hair jewelry.
Cut the sharp points off the porcupine quills. Use well-sharpened scissors to prevent the fragile quill from splintering. Carefully file the point so it is smooth. Take care not to file too hard because the quill may crack.
Make a solution of soapy water in a bowl and gently wash the quill with a soft cloth. Dish-washing detergent with anti-grease agents work well, because the quill may be greasy. Rinse thoroughly. Dry the quill carefully also. Quills splinter very easily.
Dye the quill with food coloring or manufactured dyes available at craft supply stores. Follow the dye manufacturer's instructions. Remember to dye the quill before you cut the tips off to get the best color quality. If you must dye a quill without tips, less dyeing time is required to get color. Do not subject the quills to boiling water during the dye process because it can cause splintering and cracking. Rinse the dye from the quill in cold water and air dry.
Decide the hanging length of your earrings. Choose your beads, quills, ear-wires and sterling-silver wire. You want small quills that fit desired earring length. Follow the cleaning and trimming instructions in Steps 2 and 3. Take jewelry wire cutters and cut sterling-silver wire several inches longer than the quill to provide room for the beads and ear-wires. Straighten the wire with your fingers. Use jewelry pliers to attach the ear-wire to the wire. Slide a bead onto the wire. Carefully thread the wire into one end of the quill until it comes out the other end. Attach a bead or two to the end of the wire. Use pliers to twist the wire into the desired shape to prevent the bead from slipping off. Repeat on the second earring.
You can make variations of the earring format by twisting wire around the quill or beads. The number of beads and types of beads used can create many different designs.
Select quills, beads, sterling silver wire and clasp for a bracelet. Clean the quills and cut off the sharp ends. Determine the bracelet length. Use wire cutters to cut the wire several inches longer than the desired length. Use pliers to twist the wire around the clasp opener. Slide a bead onto the wire. Thread the wire through a quill, followed by a bead. Repeat the pattern until the bracelet is complete. When you reach the end of the bracelet, use pliers to attach the clasp ring.
Make a hair stick with porcupine quills. Follow Steps 2 and 3 for cutting and cleaning the quill. Select a headpin and four beads. Place the beads on the headpin in the desired order. Cut a piece of sterling-silver wire with jewelry wire cutters. Use round-nose pliers to twist the wire around the beads in a design. Apply craft glue to the end of the headpin. Gently stick the headpin into one end of the porcupine quill. Let the hair stick air dry upright overnight.
Store quills in a cool, dry place. A plastic storage container is a good option.
Related Articles

How to Clean Sterling Silver & Opals
How to Clean Swarovski Jewelry

How to Clean Jewelry With Club Soda

How to Clean Fake Silver
How to Make Diamond Earrings Very Shiny

How to Clean Palladium Jewelry

How to Get Nail Polish Off of Rings

How to Gauge Your Ears Without Tapers
How to Clean a Diamond Ring With ...
How to Curl Kanekalon

How to Make an Edge for a Bridal Veil

How to Clean a Taffeta Dress
How to Clean Gold Chains at Home

How to Take Beaded Hair Extensions Out ...

How Do I Clean Cubic Zirconia Earrings?
What Is a Pendant Enhancer for Jewelry?

How to Remove Color From a Human Hair ...

How to Get Rust off a Fake Gold Necklace

How to Shine an Antique Diamond Ring

How to Put in a Hoop Nose Ring
Photo Credits
das müde stachelschwein image by Falkenauge from Fotolia.com