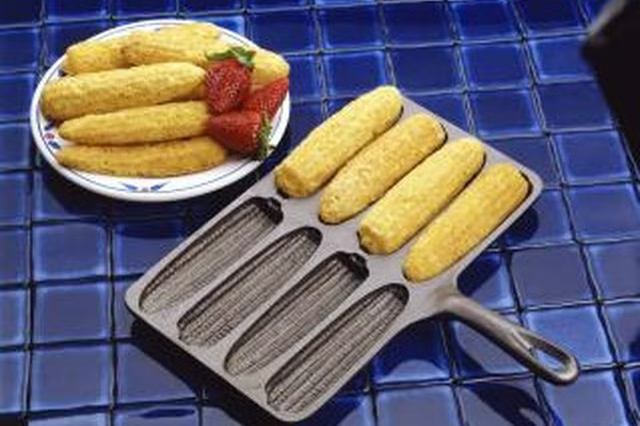
How to Cook in a Cast-Iron Corn Muffin Pan

What Can I Use as an Egg Substitute When Baking Corn Bread?
Published: Aug 22, 2013
Updated: Jan 10, 2019
1 minute read
Jupiterimages/Comstock/Getty Images

Cornbread is a Southern specialty, and the traditional way to bake it is in a cast-iron pan. Cornbread, corn muffins and cornbread sticks are all similar -- all are made with cornmeal, are baked in a pan with individual compartments and all pair well with everything from pinto beans to collard greens. When you bake in a cast-iron muffin pan, using the pan correctly will ensure your muffins don't stick.

Cornbread in Cast Iron

Step 1

Wash the cast-iron corn muffin pan with warm water and mild dish soap before using it for the first time, even if it is brand new. Dry the pan immediately with a clean towel or place the pan in a 250-degree Fahrenheit oven until it is completely dry.

Step 2

Season your the pan with a light application of flavorless vegetable oil. Seasoning your cast-iron pan seasoned is important because the buildup of oil over time creates a naturally nonstick surface that will last for years.

Step 3

Coat the interior of each pan compartment with a light application of nonstick cooking spray or melted butter. Divide the cornbread batter among the compartments and bake according to recipe instructions. Cast-iron pans with deeper compartments will require longer baking time than those with small or shallow compartments, such as cornstick pans or wedge pans that are used to create different cornbread shapes.

Tips

If it's cold in your kitchen, place your empty pan into the oven while it preheats to warm it up because placing a cold pan into a hot oven might result in thermal shock and damage to the pan.

Season your cast-iron pan after every use to maintain its easy-release properties.

Experiment with cornbread variations: Include 1 cup of canned corn, a can of diced, green chilies or a handful of cheddar cheese to your cornbread mix.

If you notice a small amount of rust on your cast-iron pan, scour, rinse and re-season it with a small amount of vegetable oil.

Photo Credits

Jupiterimages/Comstock/Getty Images

Aline Lindemann

Aline Lindemann is a health, food and travel writer. She has also worked as a social worker, preschool teacher and art educator. Lindemann holds a Master of Liberal Studies in culture, health and creative nonfiction writing from Arizona…

Sponsored
Our Everyday Life Logo

Explore our everyday life, the best source for food and drink tips, health and general wellness, healthy relationships and much more.

Property of TechnologyAdvice. © 2026 TechnologyAdvice. All Rights Reserved

Advertiser Disclosure: Some of the products that appear on this site are from companies from which TechnologyAdvice receives compensation. This compensation may impact how and where products appear on this site including, for example, the order in which they appear. TechnologyAdvice does not include all companies or all types of products available in the marketplace.