Creatas Images/Creatas/Getty Images
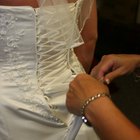
Every woman deserves to feel fresh, healthy and beautiful in her wedding dress. The perfect fit and structure in your frock leads to a more natural and refreshing look for those crucial and public moments on the big day. Adding extra boning to a wedding dress helps retain the shape of the bodice and creates more structure, so you don't have to worry about fabric sagging or showing off more skin than you anticipated. A quick addition of boning can be accomplished with just a few sewing tools.
Turn the wedding dress inside out. Measure from the top seam of the front of the dress down to the waist seam for a strapless gown. Measure from the top of the bust to the waist if the dress has more coverage. If there is no waist seam, then measure down until the point on the dress where you want the boning to end. Ideally, you want to measure along the vertical bust seams of the dress until you hit the bottom of your ribs, where support is the most crucial.
Measure from the top seam of the dress down the side seams of the dress until you hit the waist seam.
Cut off two pieces of pre-covered boning that match the seam measurement at the front of the dress. Cut off two pieces of pre-covered boning that match the side seam measurement.
Pull out the stiff center of each piece of cut boning from the fabric casing and set them aside.
Pin the casings of the boning onto the inside of the dress. Place each piece of boning covering along the key seams where you want extra support. The two front seams and the two side seams are the most common choices for extra support. You can also add boning to the back of the dress, if necessary.
Sew along each edge of the boning covering using a straight stitch on your sewing machine. Just sew along the two long, vertical seams of each covering, as close to the edge as possible, so that the casing remains intact for the reinsertion of the boning.
Reinsert all of the pieces of boning so that they sit snugly along the bodice of the dress.
Thread a needle and cinch the top and bottom of each boning casing closed using an overcast stitch to keep the boning in place. Turn the dress right side out.
Related Articles

How to Make Beaded Bra Straps

How to Bustle a Mermaid Dress

Adding Cap Sleeves onto a Wedding Gown ...

How to Take up the Shoulder Seams in a ...

How to Fix a Wedding Dress That Is Too ...

How to Make a Corset Bridal Gown Larger

How to Fix a Low Neckline on a Wedding ...

How to Hem a Formal Dress

How to Tie a French Bustle in a Wedding ...

How to Make a Wedding Shawl

How to Sew a Bra Into a Wedding Dress

How to Sew Tube Dresses

How to Make a Child's Graduation Gown

How to Sew Your Own Beads on Your ...

How to Do a Ballroom Bustle

How to Make a Bolero Jacket

How to Hem a Sequin Dress

How to Make Beaded Bra Straps

How to Hem a Sequin Dress

How to Put a Wedge of Fabric in the Leg ...
References
Resources
Tips
- Buy pre-covered boning that can be bent to fit the shape of your body. While the material inside will still offer support, the flexibility will allow for unique bust and rib measurements.
Writer Bio
Sarah Vrba has been a writer and editor since 2006. She has contributed to "Seed," "AND Magazine," Care2 Causes and "202 Magazine," among other outlets, focusing on fashion, pop culture, style and identity. Vrba holds an M.A. in history with an emphasis on gender and fashion in the 19th century.
Photo Credits
Creatas Images/Creatas/Getty Images