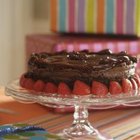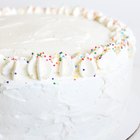
Food enthusiasts who militantly favor fresh over frozen are often surprised to learn that professional bakers and pastry chefs routinely freeze their cakes. It's not a pragmatic choice of convenience over quality or a hedge against the variability of customer traffic. It actually improves the quality of most cakes if they're frozen for at least a few hours and then thawed. Thaw the cake overnight in the refrigerator or on your counter for 30 to 60 minutes.
Getting Started
Make your cake from your favorite box mix or scratch recipe. The freezing technique works on both from scratch and instant cakes, so either one is fine. Bake the cake as you normally would and turn it out to cool. Once it's barely warm to the touch, wrap the cake snugly in two layers of plastic film wrap and transfer it to your freezer. If you plan to store the cake for more than a day or two, it's prudent to slide it into a heavy-duty freezer bag for extra protection against freezer odors, then into a rigid container to guard it from physical damage.
Cold is Cool
Freezing your cake even briefly changes its texture in a number of small ways, which contribute to a superior end product. Consider how easy it is to slice a refrigerated roast compared to that same roast when it was first out of the oven. Your cake also gains much of its structure from proteins and a brief visit to the freezer firms the proteins -- and therefore the cake's crumb -- in much the same way. Starches in the flour, which provide the remaining structure, react similarly. Freezing your cake also traps and retains moisture that would otherwise evaporate. The net effect is a cake with a richer, moister and slightly firmer texture.
Thawing Your Layers
The night before you assemble the cake, move your layers from the freezer to your refrigerator. Alternatively, let them thaw at cool room temperature for about an hour. Use those 60 minutes to clear your workspace, lay out your utensils, mix up your frosting and -- once the cake's thawed -- level or split the layers as needed. Cover the layers with a very thin layer of icing to trap any loose crumbs in place and let it sit for another hour. You can level and crumb-coat the layers before freezing them, if you wish, which speeds the cake's final assembly.
Getting it Together
Once the layers are crumb-coated and the crumb coat has had a chance to set slightly, you can finish your cake. Place the bottom layer on a cake board and spread it with buttercream or other filling and cover it with a second layer. Repeat for any additional layers. Then spread the top and sides with icing, smoothing it to a clean, level surface. Test each layer by sliding a toothpick through it to ensure it's fully thawed before you assemble the cake. If the layers are still partially frozen, your final coat of icing might crack or show blemishes after the cake finishes thawing.
Related Articles

How Long Before an Event Should I Bake ...
Should You Freeze Wedding Cakes Before ...

How to Make a Box Cake Firmer to Frost

Do You Refrigerate a Cake After Dirty ...
Freezing a Cake With Buttercream ...

How to Freeze Wedding Cake

Proper Storage of a Carrot Cake

How Early Can You Make a Wedding Cake?

How to Make Cakes Like a Bakery

Can You Put Fresh Strawberries in a ...

How to Keep Cake Moist Overnight ...

Can I Refreeze Cheesecake?

Do You Have to Refrigerate Your Wedding ...

How Long Can Cupcakes Be Stored After ...

How to Store Leftover Pancake Batter

Can I Crumb Coat a Cake With Whipping ...

How to Defrost a Frozen Cake With ...
Can You Freeze Michigan Pasties?

How Long After You Bake Should You Put ...

Do You Need to Refrigerate Whipped ...
References
- The Professional Pastry Chef; Bo Friberg
- The Kitchn: Quick Tip -- Freeze Pre-Baked Cakes
Writer Bio
Fred Decker is a trained chef and prolific freelance writer. In previous careers, he sold insurance and mutual funds, and was a longtime retailer. He was educated at Memorial University of Newfoundland and the Northern Alberta Institute of Technology. His articles have appeared on numerous home and garden sites including GoneOutdoors, TheNest and eHow.
Photo Credits
Siri Stafford/Photodisc/Getty Images