
Dust off your denim jacket and get a new look, such as a vintage vibe or tattered downtown feel, by fraying its hem, edges, cuffs, waistband, front plackets and collar. Push the envelope by daring to shred, tear and rip your jacket to accelerate fraying. Be your own designer by using your favorite denim brand as inspiration to duplicate frayed sections. Choose specific areas on your jacket to create your one-of-a-kind style.
Step 1
Wash your denim jacket according to the care label's recommendation. Even if you've only worn your jacket lightly, dirt can seep in and become evident when you fray the fibers. Even if you've recently washed the garment, do it again. Washing relaxes the fibers and eases the strand separation for fraying. Dry your jean jacket as usual.
Step 2
Spread the jacket on your worktable and select the spot or spots for fraying. Use tailor's chalk or a disappearing fabric ink pen to mark the area you want to fray. For example, if you want to fray a small section of the sleeve cuffs, mark the areas. If you want to fray the entire cuff, you don't need to mark it.
Step 3
Cut away the edge of the marked area, approximately 1/4 inch from the edge of the fabric, with your scissors. For example, if you're fraying the whole waistband, cut away a 1/4 inch from the edge of the waistband all the way around the jacket.
Step 4
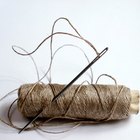
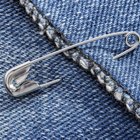
Insert a straight pin just above the edge of the denim that you cut away. If you do not have straight pins, use a safety pin. The initial markings are your starting point. If you're doing a full section and did not mark the denim, insert the pin near the stitched seam.
Step 5
Wiggle the pin until a horizontal, thread-like strand loosens. Pull the thread carefully until you expose vertical strands; continue pulling the strand until you get to the next marking.
Step 6
Continue to insert the straight pin at your original marking, pulling each horizontal strand individually. If you're working with a lightweight denim pull two to three strands together. If the strands snag or tangle with the vertical threads or become stuck, begin to pull the horizontal strands separately until they unravel. Repeat this step until you're satisfied with the length of your fringed edge. If you continue to pull more strands, the frayed section increases in width. For a subtle fray, pull a maximum of four to five strands.
Step 7
Dab antifraying glue directly onto the fabric if you don't want the jacket to continue fraying. Dab the adhesive just above where you want the fraying to stop. Test the fabric adhesive in an inconspicuous area to ensure it dries clear against your jacket's texture. You can also stitch a straight or zigzag stitch with your sewing machine approximately 1/4 inch from the edge of the frayed section. This stops the denim from fraying further. You can use a cotton thread in a matching denim color or contrasting color. Skip this step if you want the jacket to continue fraying.
Step 8
Wash the denim jacket again and dry it. The agitation in the wash causes the fibers in the fringed strands to soften and continue to fray over time. If you dabbed antifraying adhesive or machine stitched above the edge of the frayed section to stop fraying, skip this step.
Related Articles

How to Distress the Bottoms of Jeans
How to Invisibly Mend Moth Damage in a ...
How to Wear a Safety Pin in Clothes

How to Repair Denim
How to Fade & Distress My Jeans
How to Repair a Run in a Silk Blouse

How to Clean Viscose Shawls

How to Repair a Hole in a Wool Coat
How to Repair a Rivet Type Button on ...

How to Get Skinny Jeans to Be Less Tight

How to Comb the Furry Hood of a Jacket

How to Cut a Denim Jacket Into a Vest

How to Shrink Cotton Jeans

How to Delint a Sweater

How to Sew Elbow Patches on a Knit ...

How to Fix a Fraying Sweater

How to Waterproof a Leather Jacket

How to Defuzz a New Fleece Jacket
How to Repair a Ripped Back Pocket on ...
The Best Way to Fix a Rip in Nylon Wind ...
References
Resources
Writer Bio
Mercedes Valladares is the founder of M721Organics and has been an independent designer for over 15 years. Her work experience commenced during college with manufacturers based in New York and Hong Kong. Her education includes LIM College, International Fine Arts College and design certification from the Paris Fashion Institute. She produces eco-crafting videos and writes recycling articles online.
Photo Credits
Digital Vision./Photodisc/Getty Images