
Canning chicken and other poultry at home requires a larger investment in equipment than canning pickles or jam. Those can be safely preserved in a water bath canner, but meat and poultry require a pressure canner. Once you've made that investment, you'll be able to safely can anything from prepared foods to cooked or uncooked chicken.
Pressure Canning Basics
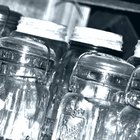
A pressure canner creates an artificially high air pressure level inside the pot, which allows it to exceed the boiling temperature of water. Pressure canners heat to 240 degrees Fahrenheit, high enough to kill the spores that cause botulism. To can foods in a pressure canner, fill sterilized jars with the food and seal them just finger tight with new sealer lids. Bring the canner to a boil with its vent open, then close the vent and wait for the correct pressure to build. Process your food as recommended by the USDA or other authoritative source.
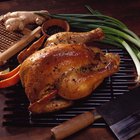
Hot-Packed Chicken
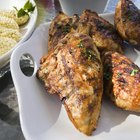
Chicken can be safely canned either raw or par-cooked, so it really is a matter of personal choice. If you like to can your chicken in larger pieces, especially with the bone in, par-cooking ensures the chicken will be fully cooked at the end of the canning process. Roast or poach the chicken until it is approximately two-thirds cooked, then cut it up and pack it loosely into sterile canning jars. Cover the chicken with hot broth, leaving 1 1/4 inches of headspace at the top. Cover finger tight with a sterile lid, and process according to USDA guidelines.
Cold-Packed Chicken
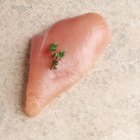
Raw chicken can be canned without any prior processing, a technique known as cold packing. To cold pack your chicken, cut it into small pieces that will fit easily in your canning jars. Fill the sterile jars loosely with chicken pieces, leaving 1 1/4 inches of headspace at the top. Don't pack them in, or the pieces in the middle might not cook properly. Sprinkle the chicken with 1/2 tsp. of salt per pint, or with seasonings such as dried ranch dressing if you wish. Do not cover the chicken with broth, just screw the lids on finger tight and process the jars as directed.
Cooling and Testing the Seal
Once you've processed the jars of chicken for the recommended time, remove your pressure canner from the heat and allow it to cool, as directed by the manufacturer. When the canner has depressurized and is safe to open, lift out your jars with a heatproof glove or jar lifter. Let the jars cool. The lids of the jars should be visibly concave, and when you press them with your finger they should feel solid, rather than buckling and springing back. This means the jars have sealed successfully and can be stored in a cool, dark place until needed.
Related Articles
How to Roast a Whole Chicken with a ...
How to Puree Chicken
How to Can Jelly Using a Pressure Canner
How to Can Fish in a Pressure Canner

How to Deep-Fry a Chicken in Minutes

How to Cook Boneless Chicken Breasts in ...

How to Cook Boneless Skinless Chicken ...

How to Can Pork Tenderloin in Half Pint ...
How to Heat Process Mason Jars to Seal

How to Re-Crisp a Cold Roast Chicken
How to Clean a Tongue Ring
How to Cook Shredded Chicken in a ...

The Proper Way to Inject Marinade Into ...
How to Cook Chicken Halves on a Weber ...

How to Cook Chicken in a Schlemmertopf ...
Can I Stop Cooking a Chicken Halfway & ...

How Long Do You Need to Boil Large ...
How to Can Venison Meat
How to Make Chinese Chicken in a Slow ...
How to Preserve Chicken
References
- "On Food and Cooking: The Science and Lore of the Kitchen"; Harold S. McGee; 2004
- National Center for Home Food Preservation; Using Pressure Canners; Elizabeth L. Andress, Ph.D.; June 2011
- National Center for Home Food Preservation; Selecting, Preparing and Canning Meat: Chicken or Rabbit; November 2009
- National Center for Home Food Preservation; USDA Complete Guide to Home Canning; November 2009
Writer Bio
Fred Decker is a trained chef and prolific freelance writer. In previous careers, he sold insurance and mutual funds, and was a longtime retailer. He was educated at Memorial University of Newfoundland and the Northern Alberta Institute of Technology. His articles have appeared on numerous home and garden sites including GoneOutdoors, TheNest and eHow.
Photo Credits
Jupiterimages/Photos.com/Getty Images