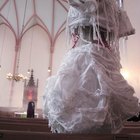
Corset-style bridal gowns are appealing not only for their elegant look, but because they are so forgiving if you gain or lose a little weight before your wedding day. All that needs to be done is to tighten or loosen the laces. However, if you find that the dress you want to wear is quite a bit smaller than your needs, the easiest way to make it bigger is to replace the back modesty panel, which is the panel of cloth in the back of a corset or corset dress that hides your skin beneath the lacing.
Remove the current modesty panel. It may be sewn in or is attached with snaps. Use a small scissors or seam rippers if necessary. Be careful not damage your dress.
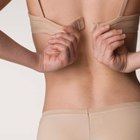
Remove all of the laces and put on the dress. Re-lace the dress until it feels comfortable. With some help from a friend, measure the length from the top of the dress down to the end of the loops or grommets (some dresses use loops and some use grommets).
Measure the widest distance between the edges of the back between the laces. This will most likely be at the very top.
Add 2 or 3 inches to all the measurements. Create a pattern with the new measurements on a piece of paper, using a pencil and ruler. Make a simple rectangle that runs the length and width of your measurements or form a tapered, more triangular pattern.
A tapered pattern will fit more neatly and a rectangle is generally easier to sew. Cut out the pattern and check it's the right size before continuing. It should cover the exposed area of your back easily with room to spare, as you need some room for seam allowances.
Iron your fabric. It must be very flat for the best results.
Fold the fabric in half. Put your pattern against the fold, with one of the short sides against the fold. Place the wider of the two short ends against the fold if you're using a tapered shape for the pattern. Pin in place and cut out the fabric carefully, leaving the fold intact. Repeat with a piece of iron-on interfacing.
Put the piece of iron-on interfacing on the fabric and iron it in place. This gives the fabric some additional stability.
Cut several pieces of polyester boning. You need one against the fold in the fabric, and then one every 2 inches down to the bottom of the panel. It's only necessary to put bones on one side of the panel and this will be in the back. These should fit easily inside the panel with about 1 inch of room on either side.
Pin the bones in place and sew. Polyester bones are designed to be sewn through. These are added to the back, so your stitches won't be visible.
Fold the fabric in half so that it resembles the initial pattern and the interfacing is on the outside. Pin in place.
Sew a 1/4-inch seam on the long sides of the back panel and turn it right side out.
Turn the raw, unsewn edge of the panel under with your fingers. Turn under about 1/2 inch of fabric and pin in place. Keep the edges of the fabric on each side as even with each other as you can. This is often tricky, so take your time. Iron the edges down to make sewing easier.
Make another 1/4-inch seam all around the edges of the back panel. This both adds stability to your work and holds the raw, unsewn edge in place so that the panel will not come apart.
Put the panel against one side of the opening of the dress and pin in place.
Stitch the panel into place along the pinned side. Hand stitch to catch only the lining of the wedding dress.
Related Articles

How to Take up the Shoulder Seams in a ...

How to Fix Overall Buckles So They ...

How to Put Boning in the Bodice of a ...
How to Make a Simple Lace Up Corset
How to Make an Alteration to a Lined ...

How to Add Elastic to the Ends of Pants ...

Adding Cap Sleeves onto a Wedding Gown ...

Directions for Extending the Waistline ...

What Fabric Makes Dresses Poofy?
How to Bustle a Mermaid Dress
How to Line a Wedding Gown
How to Make a Bolero Jacket

How To Alter Bras

How to Wear a Cheongsam

How to Narrow Wide Pants

How to Shorten the Shoulder Straps to a ...
How to Fix a Wire That Has Come Out of ...

What Is the Purpose of a Slip Under a ...
How to Bustle a Wedding Dress With an ...

The Best Formal Dress Style for Pear ...
References
Photo Credits
Digital Vision./Digital Vision/Getty Images