
Address directories that include members of a church, school group, family, club or organization help people stay in contact with one another. As the years go by, people move, get married, have children or grandchildren, and some pass away. A pictorial directory helps keep memories alive and provides a cherished keepsake for any type of group. Making a pictorial directory is something any group can accomplish at minimal cost.
Gather all the information you wish to include in the directory. Each person or family should at least have an address and contact information listed in the directory, as well as photos. Other information can include accomplishments within the group or a summary of each person's life for a school or family directory.
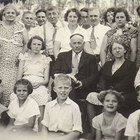
Take photos of each person or family. Take enough shots for each to choose the best one for the directory. Use various backgrounds indoors and outdoors.
Print the pictures onto pages, using a picture-printing software program, such as Printshop, a free downloadable printing program such as SoftLandMark, or a purchased service like Instant Church Directory to create the photo pages. Have the name of individuals or families printed directly under each photo.
Create an address and contact information directory, in alphabetical order, to place at the back of the album.
Print all the pages for the book using a master copy that can be used to create more directories in the future. Print the front and back covers for the directories, as well.
Assemble the printed pages as you wish them to appear in the directory. Put the front and back covers in their proper places. Add blank pages at the back of the directory for members to write information on new members, make notations of deaths and other information or to use for autograph pages. Use a spiral binding machine to punch holes and attach plastic spiral bindings to each directory.
Related Articles
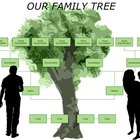
How to Make a Family Tree Using a Free ...

How to Make a Class Reunion Memory Book
How to Build a Welcoming Packet for ...
How to Trace the History of a Name

How to Locate a Missing Person in ...

How to Find Out Who You're Related to ...
How to Create a Family Reunion Booklet

How to Remove Wrinkles With Gimp

How to Find Lost Relatives

How to Advertise in Church Bulletins

How to Find a Prison Inmate in ...

How to Substitute Mayonnaise for Sour ...
How to Find School Records for Family ...
How to Make a Photo Slideshow for an ...

How to Find Someone's Birth City & ...
How to Create a Class Reunion Database

How to Prepare a Church Charter

How to Map German Surnames
How to Make a Timeline for Personal ...
How to Repair the Snap on a Louis ...
References
Resources
Tips
- Include in the directory other photos of the group or family in many situations, as well as pictures of the church, school or club gathering place. These pictures can be placed throughout the directory or together in a section at the front or back of the book.
Writer Bio
Since 1992, Mary Davis has sold numerous articles and stories, greeting cards, calendars and novelty items. She also has sold Christian education reproducible books and Christian children's journals. She writes Sunday school curricula and teacher ideas and tips for both Christian and secular markets. Her topics include everything from children's stories to OSHA/safety topics.
Photo Credits
girl watching photo album image by Daria Miroshnikova from Fotolia.com