Many different styles of hats can be made of fur. The most common style of fur hats are Russian hats, which can be shaped simply as a cap to those shaped like aviator hats. Other well-known fur hats are those worn by mountain men and Coonskin Caps. Some are very simple in the pattern and the construction, and others can be quite complicated, requiring a more experienced hand. Complexity will depend upon the pattern you chose to make.
Picking Your Pattern and Making Your Fur Hat
Pick a pattern for the style of hat you wish to make. Some patterns will reference for which size head they are made. To find your size, take a tape measure and measure the circumference of your head where the hat would sit. To know the diameter, divide the circumference you measured by 3.1417 (pi). Before you purchase your pattern, read the packaging. Pattern packaging will tell you how many yards of fur you will need, and it will sometimes tell you the level of difficulty of the pattern. The Cossack hat is often made without a pattern and can be made simply by rolling up the fur and stitching it along the seam. If you chose to follow this method, add an extra ½ inch to your circumference measurement to allow room to stitch the seam. The extra fur on the seam can always be trimmed for a more comfortable fit. If you choose to have a fur lining as well, it is recommended to add an extra two inches to the circumference of your head measurement to allow for the thickness of the fur.
Choose the fur and fabric(s) for your hat. Though you are looking to make a fur hat, many patterns call for a fabric lining. The pelt side (skin) of the fur can often be rough against your forehead, so it is not uncommon to add a fabric lining to your hat. Even the back side of faux fur can be itchy. If you don’t have your fur already, call ahead to your chosen store to ensure it carries the fur you want.
Cut out your pattern pieces. Read the pattern instructions carefully to know how many pieces of each pattern piece are needed. When placing your pattern on your fur, place it on the pelt or back side of the fur and pin your pattern to your fur or fabric before you cut. Pinning your pattern to the fabric holds your pattern securely in place, enabling you to move the fabric as needed to make the appropriate cuts. If your pattern calls for two pieces of the same pattern piece, rather than cut the same piece twice, fold your fabric over and pin your pattern piece to both layers so you only have to cut once.
Follow the step-by-step instructions of the pattern to stitch your pieces together. The order in which pieces are placed together make a big difference in more complex pieces. Before you stitch the pieces together, either by hand or sewing machine, it is recommended to pin the pieces together a little further in than where your seam will be. This will help hold the pieces together and prevent them from bunching and being sewn unevenly.
Related Articles

How to Sew a Western Shirt Pattern

How to Make a Fabric Poncho

How to Make a Hooded Cape for a Wedding ...

How to Make a Wool Coat

How to Make Fleece Gloves
How to Make a Posing Suit

How to Comb the Furry Hood of a Jacket

How to Cut a Long Synthetic Wig Short
How to Alter the Sleeves on Fur Coats

How to Cut a T-Shirt into a Punk Rock ...

Difference in Misses, Juniors, and ...

Brooch Vs. Pin
How to Make Custom Chaps
How to Make a Capote Coat
How to Make a Medieval Jerkin

Difference Between Hourglass Figure & ...

How to Replace a Sweatband on a Cowboy ...

How to Take Measurements for a Raincoat
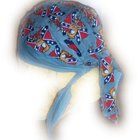
How to Make Skull Caps With a Bandana

Can Tailors Alter Fitted Caps?
References
Writer Bio
Based in the Northwest, Shannon Kempe recently switched careers to pursue a longtime passion for writing. Kempe attended Southern Oregon University followed by a strong business career. She started a blog in 2007 on the struggles of growing older, which quickly gained national readership, and now has articles published on eHow.com.