Nearly all clergy of some denominations wear clerical shirts but other clergymen and women choose clerical shirts because they are instantly identifiable, always neat and tidy and present uniformly without being formal. All clerical shirts have a white or partially white band collar regardless of the style, color, pattern, or kind of fabric used for the remainder of the shirt. An all-black clerical shirt with a white collar is acceptable as well as an all white shirt but some clergy may also select other solid colors, stripes and patterns for their shirts.
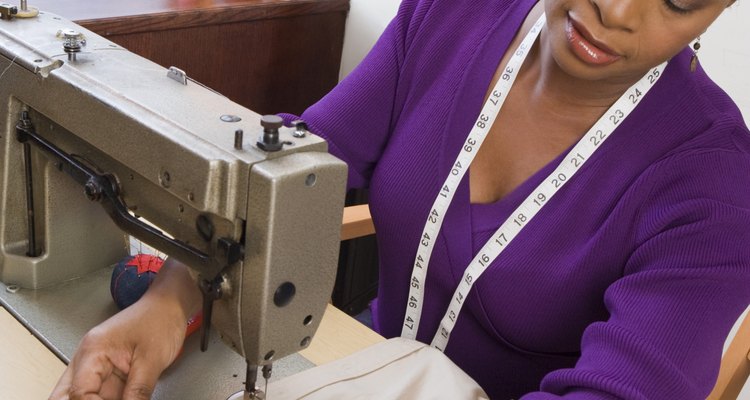
Select a button front shirt pattern that includes instructions for a band collar in addition to a conventional shirt collar. Ideally the pattern will also include a box pleat in the back under the yoke, but a pair of pleats will be satisfactory. The pattern may provide for either long or short sleeves; a clerical shirt can have either, but some clergy prefer French cuffs on long sleeves.
Select a fabric for the body of the shirt from suitable and comfortable choices. Remember stripes must be used vertically. Select lightweight interfacing for the length of the center front and the band collar.
Place the pattern on the fabric with pins or weights. Omit the collar and use only the band. Cut out the fabric, marking notches and circles with chalk or a water soluble marker. Mark the center front according to the pattern markings and add the marks for pockets if desired. Cut out the interfacing for both sides of the center front and for the neckband.
Construct the major components of the shirt in the following order: the band collar, the back pleat, the entire back including the yoke, the side seams, the shoulder seams and sleeve seams, pressing each seam after stitching. For long sleeves, construct French cuffs or flat cuffs. Construct the pockets if desired.
Fit the shirt by wearing it inside out and making adjustments in the width of the seams before finishing the edges. Check the length of the sleeves as well as the length of the shirt at this time and make necessary adjustments. Short sleeves may be hemmed at this time. Stitch about 1/2 inch from the neck edge all the way around.
Apply interfacing to both sides of the front opening along the marks for the facing. Baste or press it in place. Edge finish the facing with an overcast stitch. Turn the facing to the outside of the shirt and stitch across the bottom edge. Turn the facing inside and press. Pin or baste the facing in place.
Hem the bottom of the shirt as desired, with curved shirt tails, with a straight hem, or with an opening about 4 inches long at the bottom of each side seam. The hem should be about 5/8 inch wide and machine or hand stitched. Place the pockets on the shirt front at the marked position. Top stitch by machine or by hand about 1/4 inch from the edge.
Clip the neck edge of the shirt down to the stitching in several places. Apply the band collar to the neck edge, fitting it with pins and matching the pattern markings. Stitch the seam and turn the pressed edge of the collar band over the seam. Sew it by hand. Topstitch the collar band about 1/4 inch from the edge if desired. Continue the topstitching down the front of the shirt.
Pin sleeves to armhole edges, working from inside the shirt and inside the sleeve. Check to be sure the right sides of the fabric are facing each other. Match all the markings and ease the top of the sleeve with basting stitches if necessary so that it fits without puckering. Stitch each seam twice and trim the seam allowance down to 1/2 inch.
Apply the cuffs to long sleeves, following pattern directions. Edge finish all interior seams with overcast stitch.
Mark the position of buttons and buttonholes on the shirt fronts. On a woman's shirt, the buttons are sewn on the right side of the center front. On a man's shirt, reverse the sides. Check to be sure the fronts of the shirt overlap properly and that the collar band also has a button and buttonhole. Sew on matching buttons and make buttonholes where marked.
Press the shirt before wearing it with a purchased clerical band collar attached with collar buttons or studs.
Related Articles

How to Hem T-Shirts
How to Put Rank on an ACU Cap

How to Put on a Clergy Collar
How to Sew a Gusset on a Sleeve

How to Starch Dress Shirts for a ...

How to Use a Sewing Machine to Make a ...

How to Sew a Western Shirt Pattern

How to Narrow Wide Pants

How to Shrink the Collar of a Shirt

How to Sew the Rank on an ACU Patrol Cap

How to Wear a Tab on Collar for ...
How to Attach Ribbons to a Navy Uniform

How to Keep a Cuff in Jeans

How to Replace Shirt Buttons With Cuff ...

How to Cut a V-Neck on a Hoodie

How to Roll Up & Button a Girl's ...
Navy Uniform Regulations & Collar ...
How to Make a Simple Lace Up Corset

How to Make a Fabric Poncho
How to Hem a Sequin Dress
References
Writer Bio
Karen W. Waggoner is a retired teacher and lifetime scribbler. She has published short stories, essays in anthologies and periodicals. Waggoner is the author of the memoir, "On My Honor, A Navy Wife’s Vietnam War." She is a graduate of Stetson University, the University of Connecticut and Christian College for Women.
Photo Credits
Jupiterimages/Creatas/Getty Images