
If you discover a hole in the armpit of your shirt, don't immediately dismiss it as destined for the trash. Repairing rips in clothing is simple, and the armpit is an inconspicuous enough location that nobody will even notice your handy work. With a few stitches of a needle and thread, your shirt will be as good as new.
Purchase thread that matches the color of the shirt. The closer the match, the more inconspicuous the repaired tear.
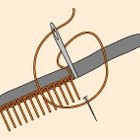
Thread a needle. Make the thread length a few inches longer than the rip.
Turn the shirt inside out. Hold the edges of the rip together so the material puckers slightly inward rather than outward.
Position the needle at the right side of the rip if you are right handed. You want to work your way through the rip, so don't start in the middle.
Push the needle down through the fabric close to the right edge of the tear. Continue sewing and pulling in a zigzag or hemming stitch until you reach the end of the rip. You won't be able to see the needle once it pokes through to the exterior of the garment.
Keep the stitches as close to the tear as possible. You will be able to see the needle again as it pokes through to the interior of the garment.
Keep sewing until the entire tear has been sewn together, re-threading the needle as necessary.
Complete the last stitch as you normally would, but don't pull the stitch taut. Instead, leave a loop of thread. Bring the needle back up toward you as close to the entry point of the stitch as possible.
Pull the needle gently through the loop of thread until a snug knot is formed. Repeat the loop stitch at least one more time for extra stability. Try to keep your second knot as close as possible to the first.
Cut off any loose threads.
Related Articles

How to Hand Sew a Tear in Pants
How to Fix a Frayed Buttonhole

How to Repair Denim
How to Hand Sew a Belt Loop on Pants
How to Fix a Ripped Pocket

How to Fix Holes in Cotton Shirts

How to Get Cigarette Burns Out of Fleece
How to Hem a Shirt Collar

How to Fix Cuts in Polyester Clothes

How to Fix Holes in Stockings

How to Extend a Neck Hole on a Hoodie
How to Put in a Separating Zipper

Repairing Ripped Jeans Without a ...
How to Fix a Snag In Cotton Pants

How to Repair Holes in Cashmere Sweaters
The Best Way to Fix a Rip in Nylon Wind ...

How to Fix a Wire That Has Come Out of ...

Do I Need to Tie a Sirloin Roast?

How to Use a Sewing Machine to Make a ...
How to Wear a Safety Pin in Clothes
Photo Credits
Ablestock.com/AbleStock.com/Getty Images